
24 May
2014

While traveling Cambodia, one must consider several aspects of Cambodian money. What’s the currency? How far does a US Dollar go in Cambodia? What are other issues to be mindful of?
The cost of food is always a great way to gauge cost of living while traveling. In my Cambodian travels, I’ve been spending less than $12.00USD a day for food! Typically $12.00 only covers one meal in the U.S., but take a look at the other side of the world in Cambodia and you’ll get yourself 3 full meals with an afternoon snack included. 🙂 The food is fresh, delicious and will satisfy your taste buds!
$1.75USD total for breakfast: $0.75 coconut, $1.00 16-bundle of small bananas
$3.50USD total for lunch: $1.00 fruit smoothie, $2.50 khmer curry
$1.50 total for afternoon snack: bundle of lychee
$5.00 total for dinner: $2.50 khmer crepes, $2.50 fruit salad
total= $11.75

Khmer Vegetable Curry . . . my absolute favorite 🙂
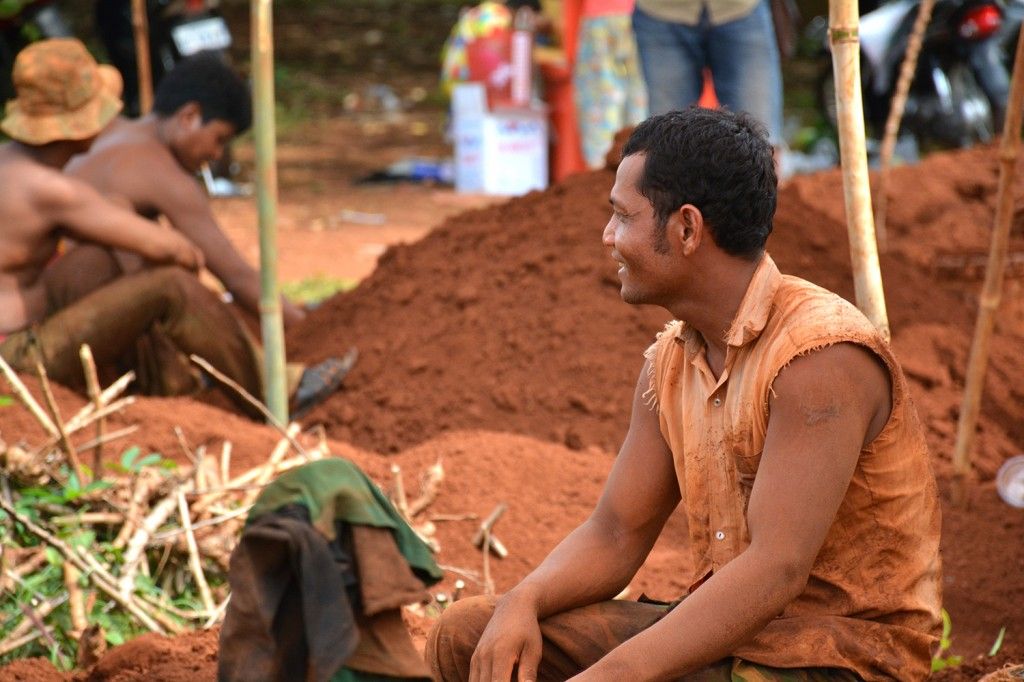
Yes. There are definitely areas in Siem Reap, Cambodia that are cheaper than others. For instance, restaurant prices will be twice as high when dining at restaurants on Pub Street (the most touristy area of Siem Reap). Street and corner stands (as opposed to restaurants) are 75% cheaper than when buying fresh fruit (coconuts, pineapple, papaya, bananas).

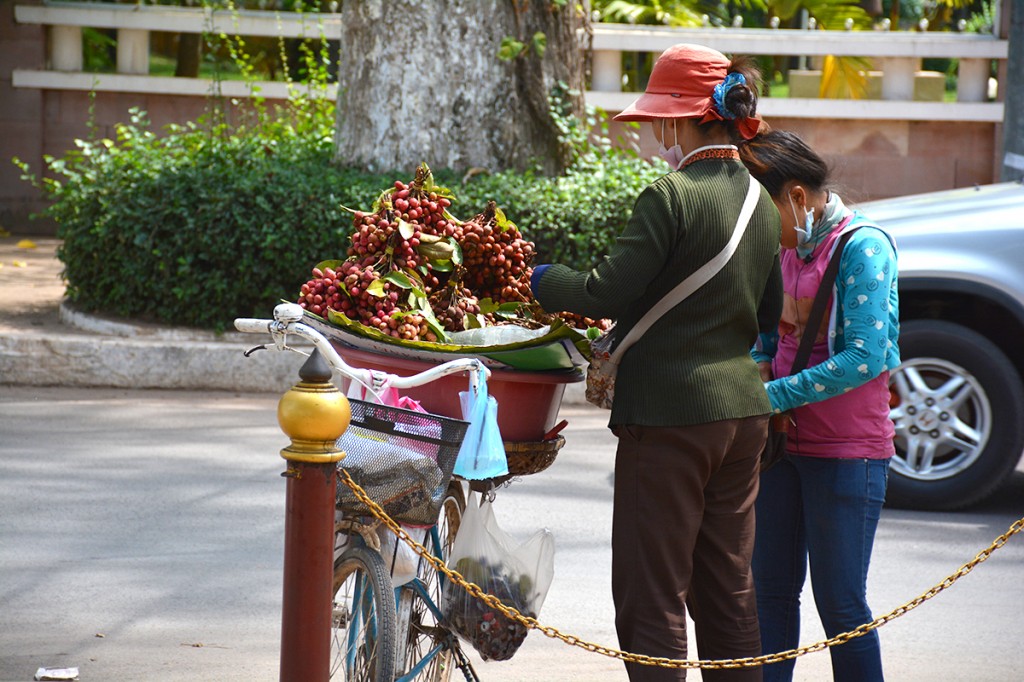
Khmer women selling lychee at the corner.
The Old Market near Pub Street in Siem Reap is even cheaper when buying fruit. Old Market vendors sell by the Kilo (I usually buy at 1/2 kilo). Don’t let their initial asking price of $5.00/kilo fool you — you can always bargain lower or find a different seller among the many inside the market for a better price.
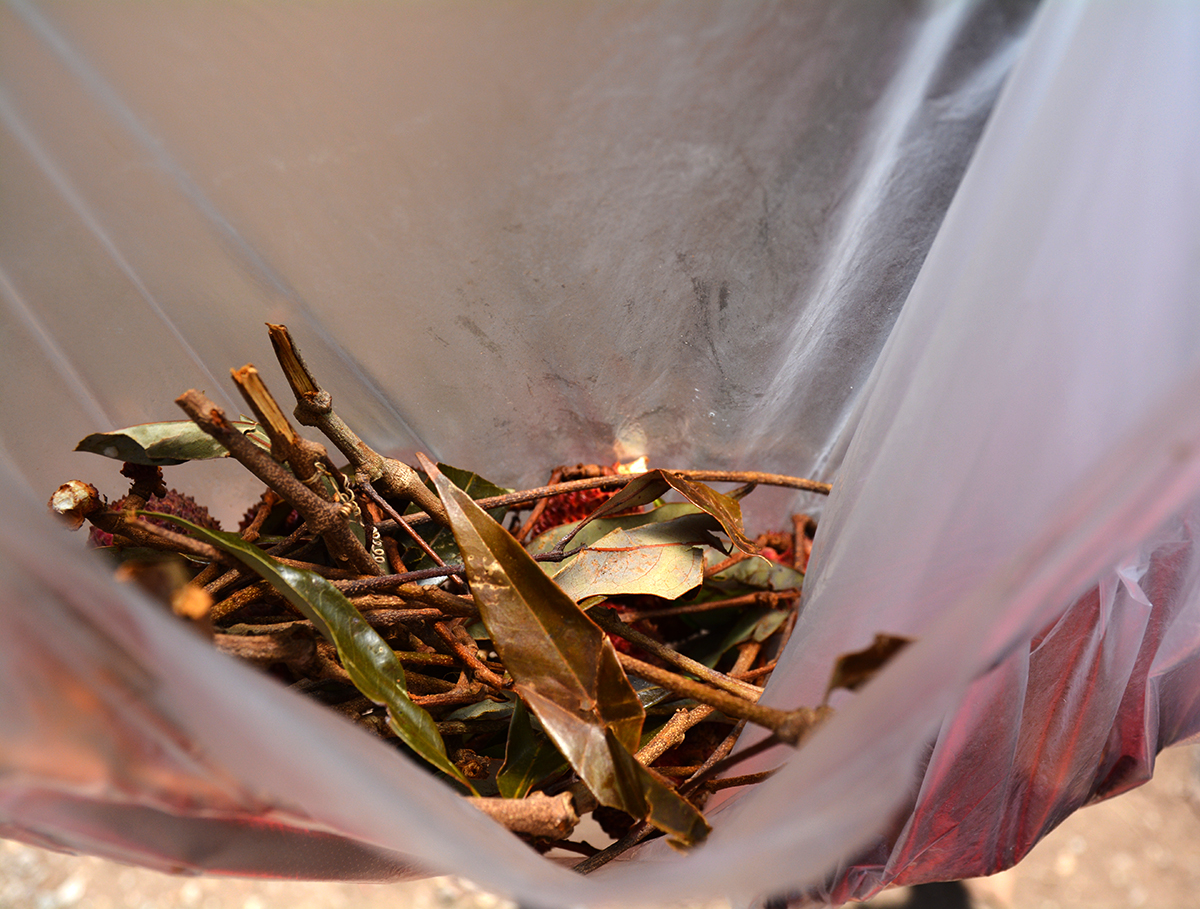
Taking a photo of my lychee before I eat them all up is a challenge! 🙂
Moreso than most countries, Cambodian vendors allow customers to use multiple currencies — either US Dollars or Cambodian Riel. Interestingly enough, USD often comes out of the ATM machines in Cambodia! As of now, one US Dollar is equal to 4,000 Cambodian Riel.
If you’re making a small purchase, some vendors will not accept large USD notes. For example, you might have trouble buying a $.75 mango with a $10 dollar bill. At restaurants, large notes are not an issue.
Tip: Before coming to Cambodia, my friend took out $300 USD from her bank and asked for all one dollar bills — I suggest doing this!
Unless you’re using Cambodian money (the riel), then I suggest carrying crisp USD notes (no creases or tears). The local Khmer people can be picky about their money. For instance, if you give a vendor a ripped or crinkled USD note, they might note accept it!
So, while making a bank withdrawal, ask for “new money” instead of old. On the other hand, Cambodian money (the Cambodian Riel) is viewed differently — the crispness of notes is not a concern.

Both new and worn riel are acceptable to use!
These are the 5 most important things to consider about Cambodian money while traveling in Siem Reap or other parts of this beautiful Southeast Asian country. Click here to read about my recent experience celebrating Khmer New Year in Siem Reap.
I hope you found this post useful! I’d appreciate your feedback and look forward to hearing your comments about your deals in Cambodia or elsewhere abroad!
xo,
Danners


We had heard great things about the small west coast Thai beach called Railay Beach. Our friend Jason whom we respect in many aspects of life — especially Thai travel — recommended insisted that we check out Railay Beach.
We decided to move north from Langkawi, Malaysia and our first stop was Railay Beach in Krabi.
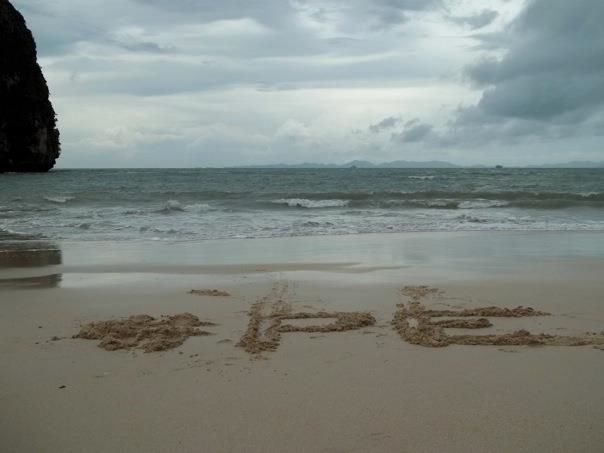
Always bringing the #PE (Positive Energy) especially at the beach in Thailand!
Railay Beach is a hidden gem. The type of spot veteran backpackers try to keep a secret. This tiny paradise island peninsula is hidden on the West Coast of Thailand and is only accessible by boat because of the monstrous limestone cliffs that barricade it.
Railay Beach features beautiful white sand beaches and the gorgeous, crystal clear waters Andaman Sea. Railay Beach is located between the city of Krabi and Ao Nang in Thailand. The limestone cliffs of Railay Beach make for some of the best climbing in the world.
Railay Beach is also popular due to its quiet relaxing atmosphere. Accommodation ranges from bungalows and medium-priced resorts in East Railay to a collection of five-star resorts focused on West Railay. The four main areas of Railay consist of Tonsaid, East Railay, West Railay and Pranang. Backpackers tend to congregate and lodge in the Tonsai portion of the beautiful, remote peninsula.
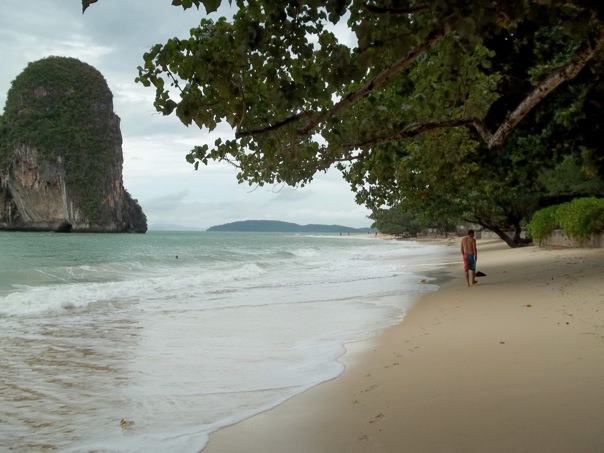
Paz taking in the beautiful coast of Railay Beach
Railay Beach is in the Southwestern part of Thailand, 120 miles north of the Malaysian border and 100 miles south or the Burmese (Mynamar) border. Railay Beach is 25 miles east of Phuket.
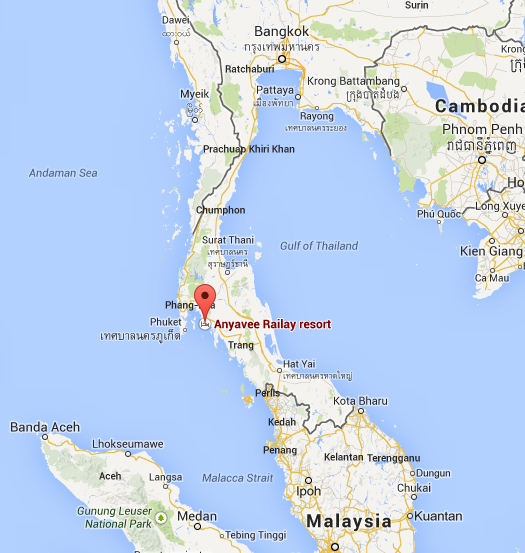
Railay Beach Location in Relation to Malaysia & Burma
If you want to bus from central Malaysia, take a bus to Hat Yai, Thailand. In Hat Yai you will probably be dropped at a tourist transport office – they will always be looking to help you there. From there jump on a bus to Krabi.
How we did it: We caught a ferry from Langkawi to Satun, Thailand. There we bought minivan tickets to van us to Krabi (5 hrs, 230 Baht, $7.5 USD). This was very simple as opposed to the first option.
Beware that there will be several “pointless stops” along the way. If you’ve ever traveled in Thailand, you know that the buses stop every 30 miles or so for no reason at all. The driver lets everyone out in the hopes that you’ll buy something from the store. The drivers no doubt receive kickbacks from the store for these “pointless stops.” It got to the point where I would say to Brian, “Another pointless stop?” and Brian would laugh and reply, “Yeppp.”

Krabi Thailand Pointless Bus Stop

Brian Reading during a Pointless Bus Stop in Thailand. Good for practicing patience 🙂
From Krabi you get to take a small fishtail boat (with a lawnmower engine) over to Railay Peninsula (100 Baht, $3 USD). This was quite an experience for us because a thunderstorm erupted on our way over. For a few seconds, we thought about ditching our backpacks and jumping overboard!
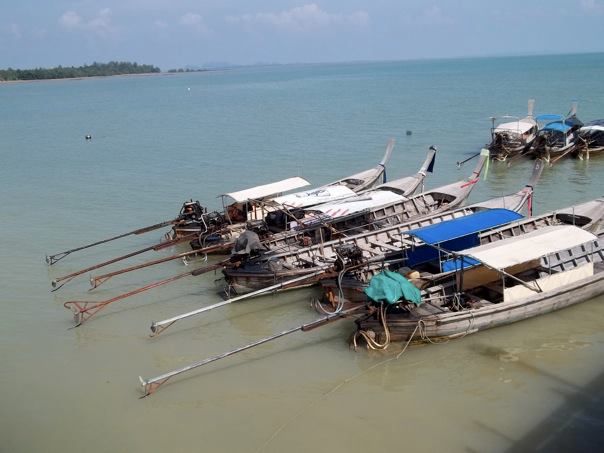
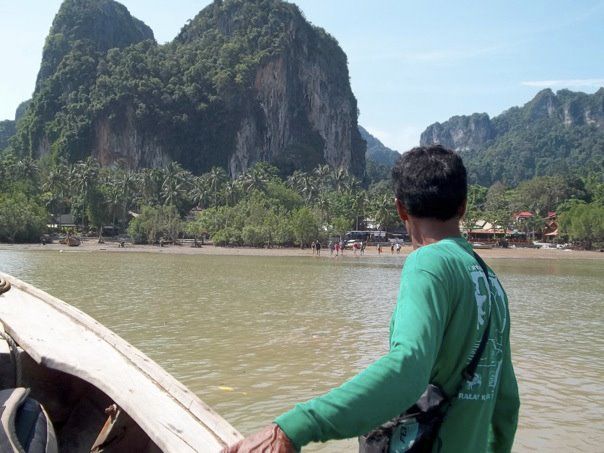
You will take a fishtail boat from Krabi to Railay Beach and you’ll arrive at East Railay Beach
There a few ways to get to Krabi from Bangkok.
First option: Sleeper bus. While it takes 12 hours to get there, a price point around 500 Baht ($17 USD) is not a bad option.
Second option: Train. Krabi does not have a railway station, but it’s easy to get there using a comfortable train to Surat Thani and then an air-conditioned bus. Using the overnight sleeper train from Bangkok (8.5 hrs), the train & bus to Krabi takes the same amount of time — it’s just much more interesting and inexpensive. (800 baht/$27 USD)
You will find buses to Krabi waiting at Surat Thani station once your train arrives. The bus fare is about 200 baht ($6.5 USD), the journey time from Surat Thani to Krabi takes 3 hours. You can purchase a train+bus combo ticket from Bangkok to Krabi.
From Krabi you get to take a small fishtail boat over to Railay Peninsula (100 Baht, 3 USD). You will arrive at East Railay Beach.
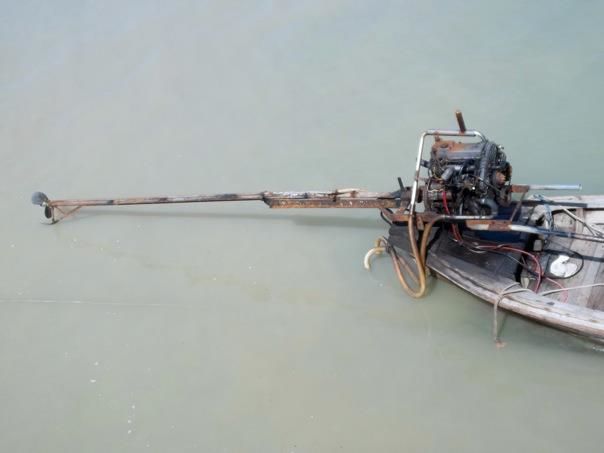
Fishtail Boat with Lawnmower engine in Krabi, Thailand
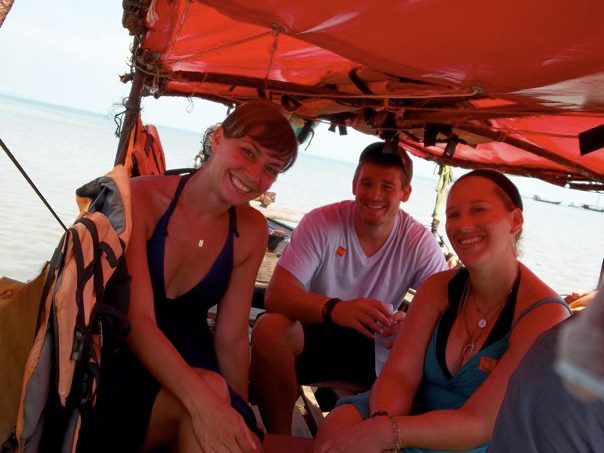
Brian w/ our Backpacker Friends on Way Back from Railay Beach to Krabi (tarp over our heads this time) 😉
Your boat might stop here if it’s low tide and the water is too low. You walk the rest of way to East Railay Beach!
This is where your driver might stop the boat. The water gets very shallow (about .5 meters or 1.5 feet) — the engine would get ruined if he drove it up to shore. Be sure to have sandals (and good balance) for this walk!
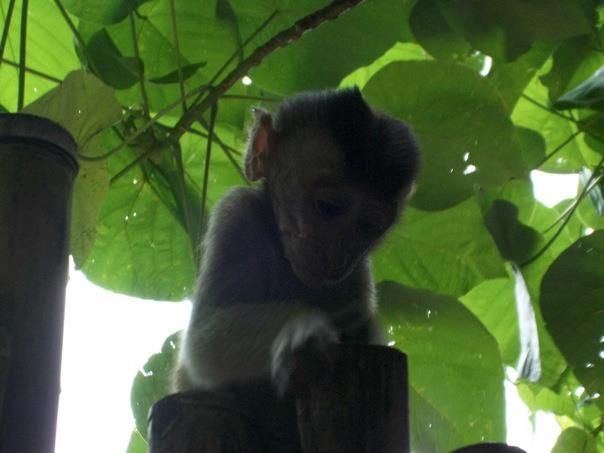
This baby monkey let us get close to him/her for close up pic 🙂
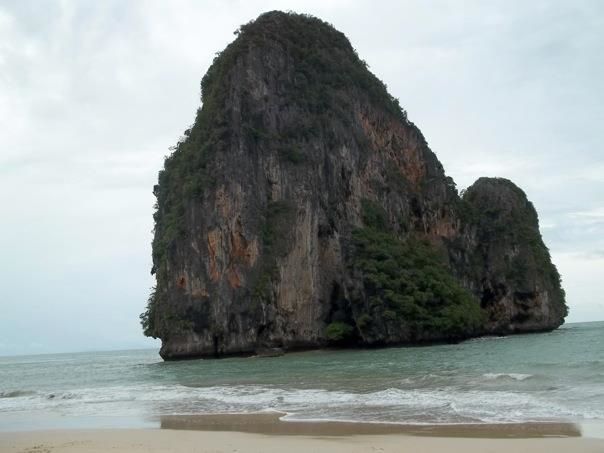
Enormous Limestone Cliff on West Railay Beach
You can explore the whole island in 4-5 days so it depends on what type of experience you’re looking for. We’re always in favor of traveling slow. We were content with reading books on the beach and casually exploring every little nook and cranny the island had to offer. You could easily stay here for a month if you’re a traveler that likes to take things slowly but we found that one week was a nice stay.

Where to stay on Railay Beach?
Railay has not been a major backpacking destination for a long time (this place was the undiscovered and a backpacking mecca in the 70’s and 80’s), so there are not many formal hostels. We were able to find cheap accomodation ($10 USD per night) but opted to stay in a slightly nicer place for $15 USD per night.
Be aware that the 1st of November prices at Railay are still at low season rates so it might be worth shopping around once you arrive. Have a walk around to see what you can get deal wise. It is a very small place so it won’t take long.
You’ll arrive via fishtail boat at East Railay Beach. You cannot swim or climb here but you’ll likely spend the bulk of your time here (lodging, eating, shopping, bars, etc.). For climbing and beach lounging, you’ll be on West Railay Beach. Not to worry, the entire peninsula is 2 square miles or 3.5 square kilometers.

Tourist Map inside a Cave on Railay Beach
1. Railay Beach Rock Climbing. Enough said. Scale the cliff or watch some of the world’s greatest climbers scale the challenging cliffs of Railay.

A Rock Climber’s Paradise. We watched a man from Spain climb for hours!
2. Chill out on the Phra Nang portion of Railay West Beach (a short walk from Tonsai where you’ll probably stay if you’re a backpacker)

Paz reading under palm trees on Phra Nang Beach
3. Walk through Phra Nang Cave (this is how you get from East Railay to West Railay Beach)
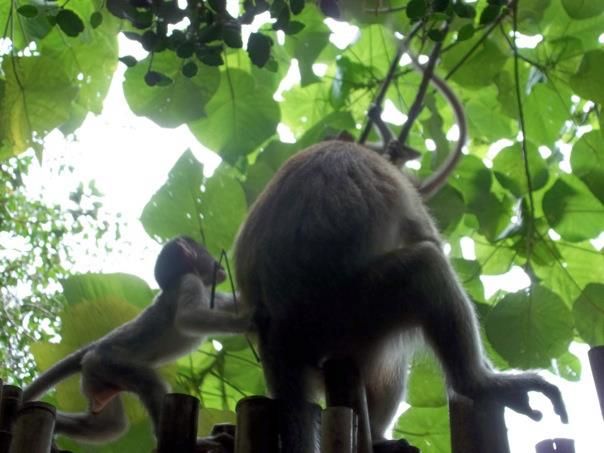
Mother and Baby Monkey in Phra Nang Cave
4. Shop for unique, inexpensive local handicrafts and clothing on East Railay Beach

Shopping in East Railay area of Railay Beach
5. Go to the Rasta bar called “The Last Bar” for a Rasta music, a drink, and to see the Rasta Man and his pet otter
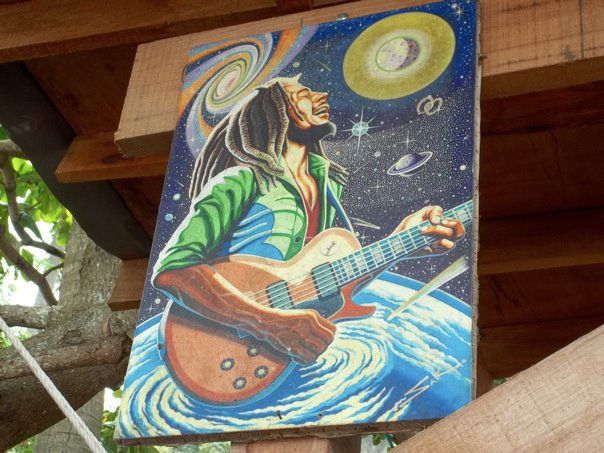
Marley Painting at the Rasta Bar, “The Last Bar” on East Railay Beach
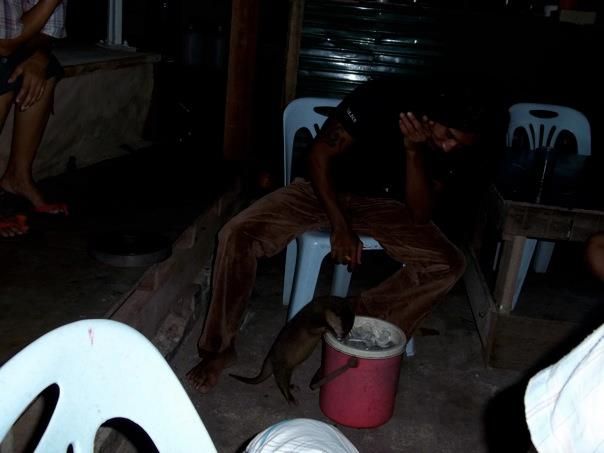
Rasta Man with his pet otter at “The Last Bar” on East Railay Beach
Fresh seafood from the fisherman and local fruit. Also, don’t miss the indian rotis! Sit right on the water on East Railay as you enjoy tea, indian roti with banana and peanut butter along with the perfect sea breeze of the Andaman Sea.
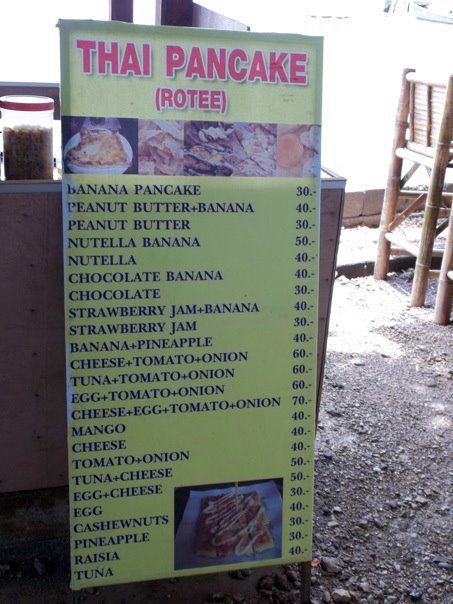
Prices for Indian Rotis on East Railay Beach (starting at about $1 USD)

This is where we ate breakfast every morning…. so relaxing!
Hostel: $15 USD
Food: $14 USD
Transportation: $0 USD (no roads or vehicles on the entire peninsula)
Railay is a bit more expensive than comprable areas probably because the difficulties in transporting food to the peninsula. Think about it — every item of food that does not grow on the island peninsula, has to be transported on a small fishtail boat with a lawnmower engine. It’s really quite a unique process!
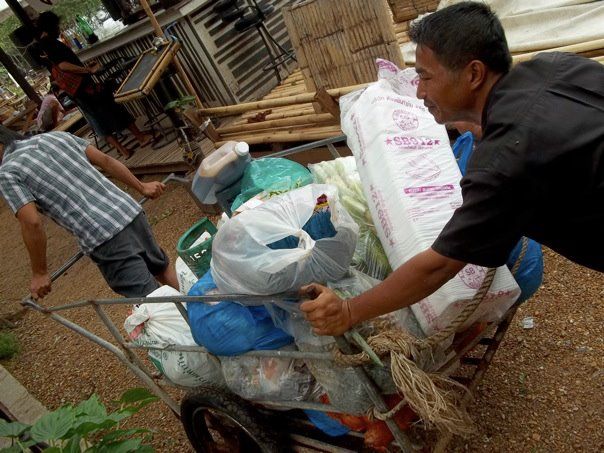
Locals transporting garbage from the island to a fishtail boat to dispose of it on the mainland of Krabi
Overall, Railay is a very laid back (no roads!), beautiful, interesting place with great food and friendly people.
Check out our other travel posts:
Traveling to Thailand for the first time? Post a question in the comments section below, we’ll respond with advice!
If you liked this post, please share it with friends and leave a comment!
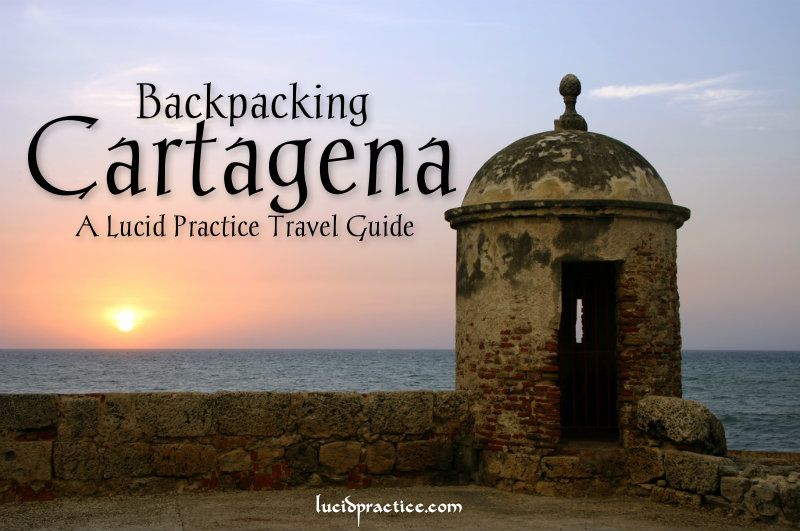
Cartagena is a beautiful and historical city on the Caribbean coast of Colombia. It is ranked as Colombia’s top area for tourism and boasts many museums and ornate churches as well as beach views and a warm tropical climate. Whether your ideal destination is one with old city charm, exciting nightlife, or somewhere to work on your tan, Cartagena is sure to please.

Colombia exclusively uses the Colombian Peso as their form of currency. Roughly speaking, $1 USD = $2,000 COP. We recommend you exchange as little currency as possible. Instead, withdraw pesos from ATMs (“cajeros” in Spanish) which are available in the airport, bus station, and all over the city offering the best exchange rate.
How to get to Cartagena, Colombia from Panama City, Panama: Sail. Crossing from North America to South America by land is not possible at this time because of the roadless area separating the two called the Darien Gap. The best solution to crossing the border to the Caribbean coast of Colombia is to book a ride on a sailboat. These boat trips usually cost $450-550 USD per person. While this sounds very, very expensive, these trips include all of your food and housing for five days and take you on a once-in-a-lifetime trip to Panama’s San Blas Islands.
Stephanie at itravelbyboat.com is a great person to get in contact with to schedule your trip. She always keeps an up-to-date schedule of all the captains in the area and will help you arrange transportation to the port. I have heard incredible things about the Independence, a 26 passenger sailboat. The bigger the boat, the more comfortable ride you’ll have and, of course, the more new friends you’ll meet!
Note: The first three days are spent enjoying the San Blas Islands, however, the last two full days are spent crossing the open sea. Be sure to bring seasickness medication!
The other option is flying. Flights from Panama City, Panama to Cartagena, Colombia cost $300-450 USD and usually have a connection in Bogota. I strongly suggest spending the extra $100-150 USD to sail and get an extra four days of incredible experiences out of this trip!
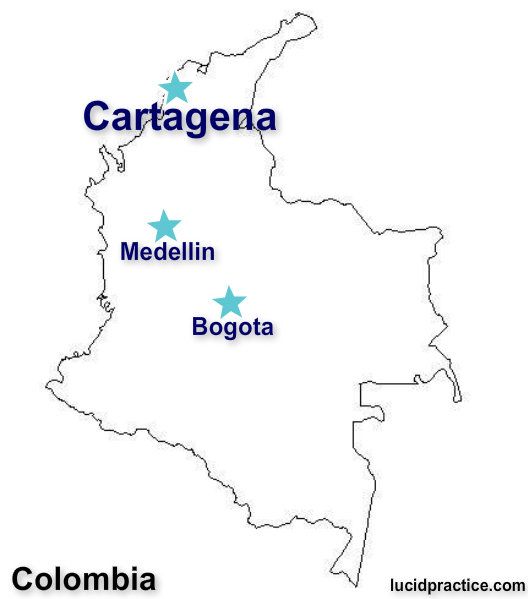
How to get to Cartagena, Colombia from Bogota: Fly. If you are able to book at least a week in advance, you can purchase this quick flight for $45-70. This sure beats the 20 hour bus that costs the same amount.
How to get to Cartagena, Colombia from Medellin: Bus. This bus takes 13-14 hours and costs $104,000 COP per person before negotiation. Colombian bus prices are negotiable! Work your magic. I took a night bus and suggest this option. The route is safe and the bus is comfortable with reclining seats and a bathroom on board. Bring a blanket and dress warm — the air conditioning is on max all night long. Earplugs are also necessary for this trip, as the music is still blaring past 3:00 AM.
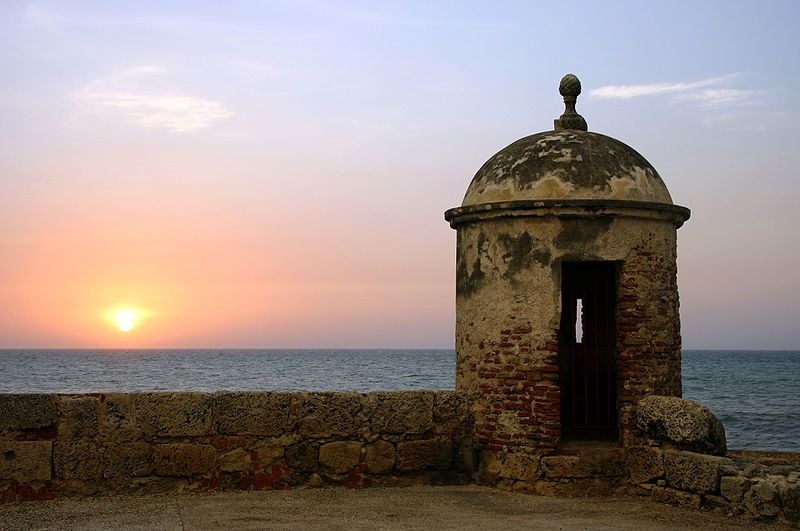
1. Walk the Wall. The historical area of Cartagena is known as The Walled City. As you may have guessed, this area is surrounded by a massive stone wall that dates back hundreds of years to the Spanish Colonial era. The wall is still intact and is a popular and free tourist attraction for all who visit the city. Wait for the heat to break when the sun starts to set and take a walk on the wall around the city. The best time to do this is before 10:00 AM or after 5:00 PM, as the walk is just too hot otherwise. Why not grab a $1,500 COP ($.75 USD) can of Aguila Cerveza or $1,000 COP ($.50 USD) lemonade and watch the sunset over the water?
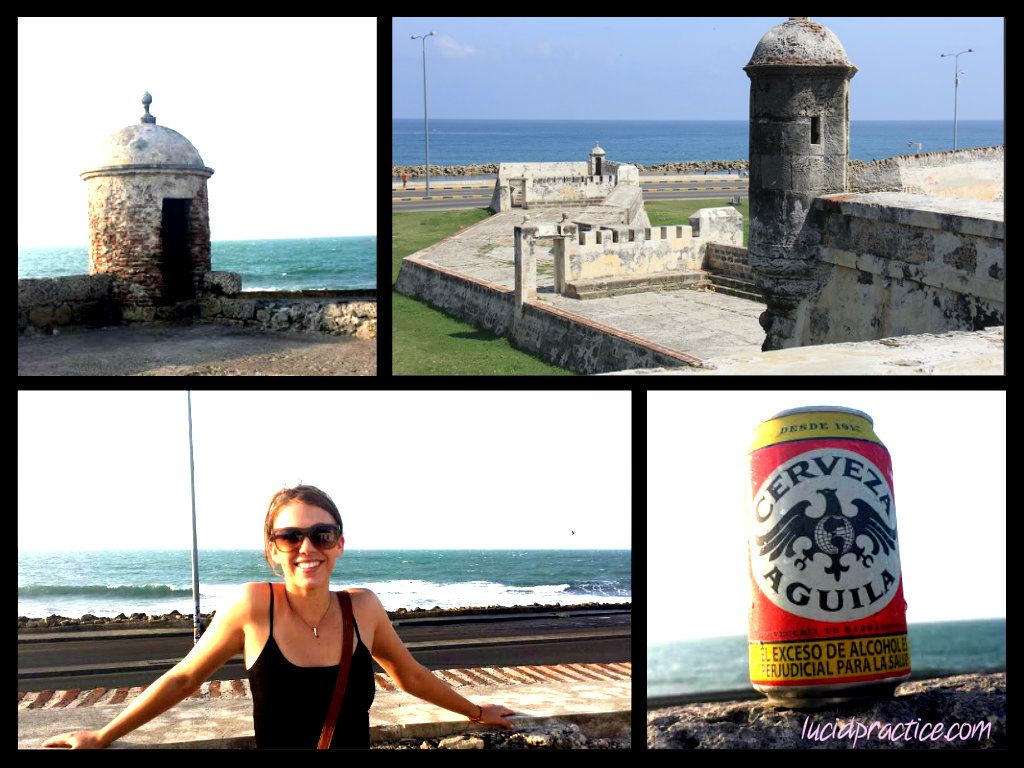
Walk along the Wall in Cartagena
2. Sight-see in the Walled City. Grab your sunscreen, hat, and sunglasses and get exploring. Everything in the Walled City is in walking distance, so check out some of Cartagena’s many churches, including Iglesia de San Pedro Claver, which was named in honor of its priest after his role in helping African freed slaves. There are numerous museums to stop in as well, most ranging from $7,000-$15,000 COP ($3.50-$7.50). The Museo de Oro (Gold Museum) has no admission fee, is air conditioned, and is open Tuesday-Friday.
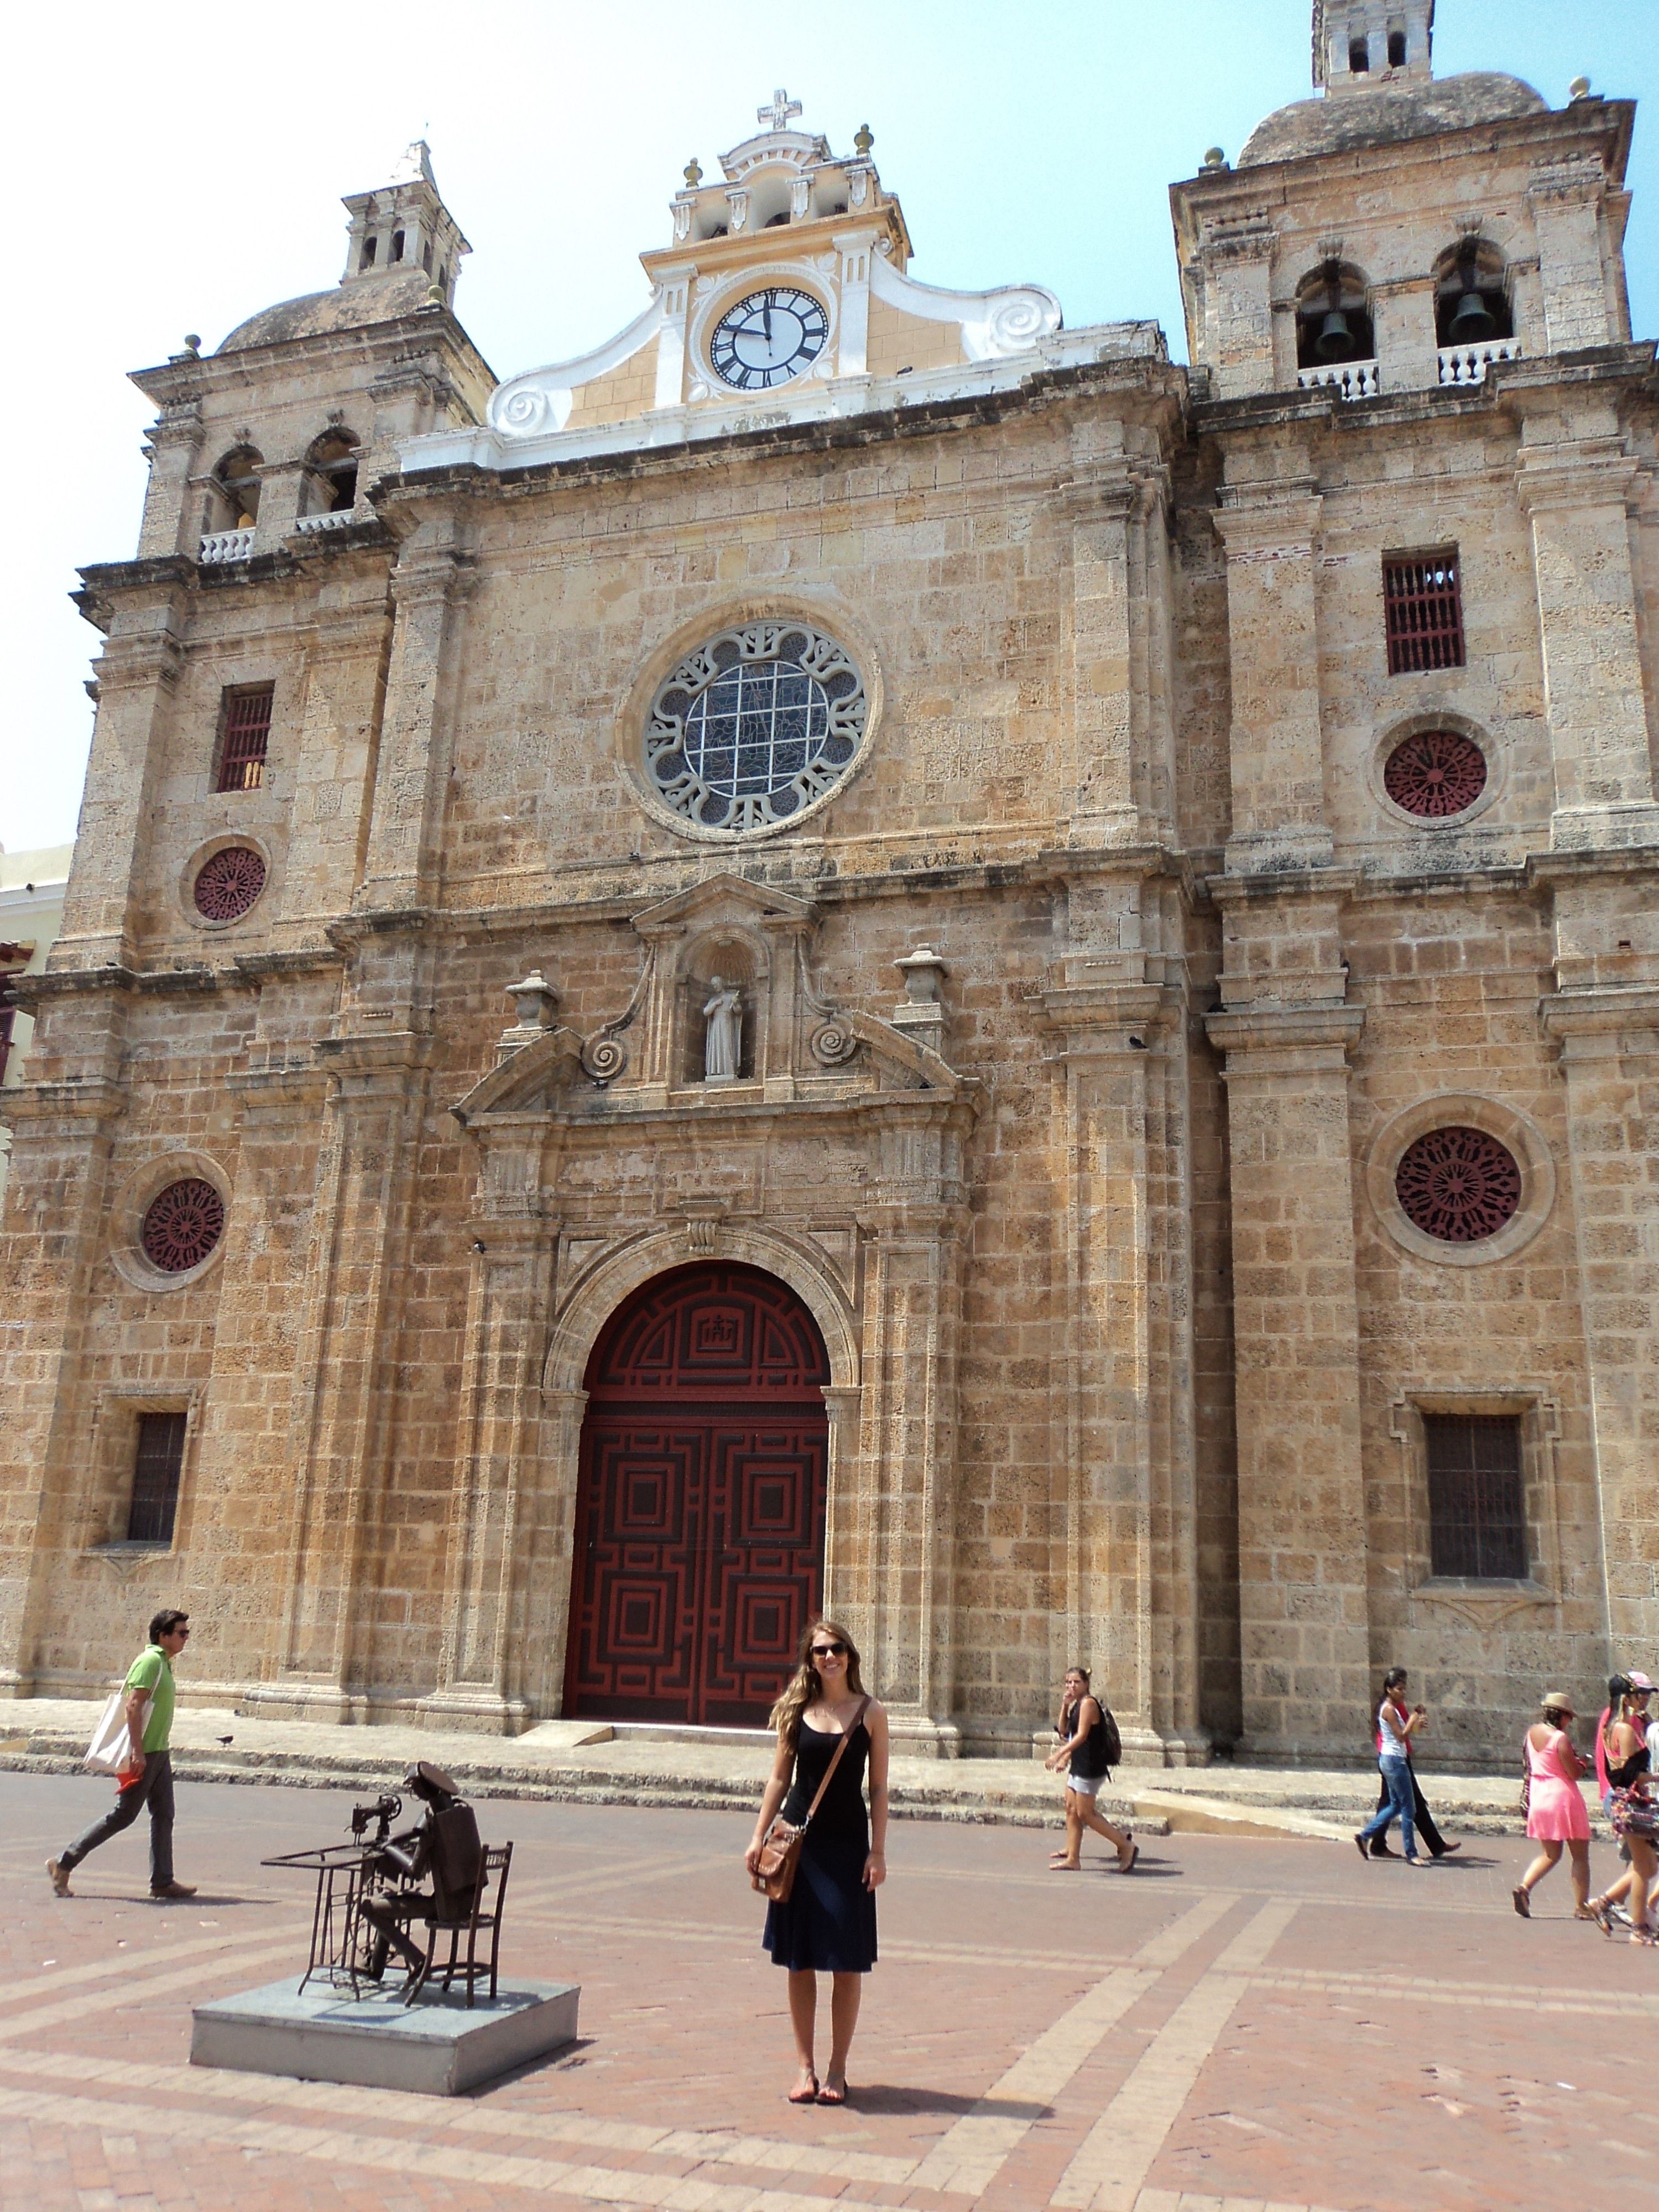
One of many ornate churches in Cartagena, Colombia
3. Hop on a Party Bus. Open air “Chiva” buses constantly tour Cartagena just outside of the Walled City. You can spot them by their bright colors and bumping music. Colombian and foreign tourists bring their own drinks and enjoy this ride around the city. Prices can vary so have your Colombian negotiation skills ready!
4. Visit Castillo San Felipe de Barajas (the San Felipe Castle). Its called a castle, but its more of a fortress. This 350 year old castle was built, along with the wall, to protect Cartagena from pirates. It takes around 20-25 minutes to get here on foot from the Walled City. You won’t be able to miss this mammoth structure in the midst of an otherwise normal part of town. The real attraction of the castle is its role in the history of Cartagena and the sheer size of it. Skip the $20,000 ($10 USD) COP admission fee and appreciate it from outside. Inside the castle grounds, there are no guides, no information offered, and no museum.
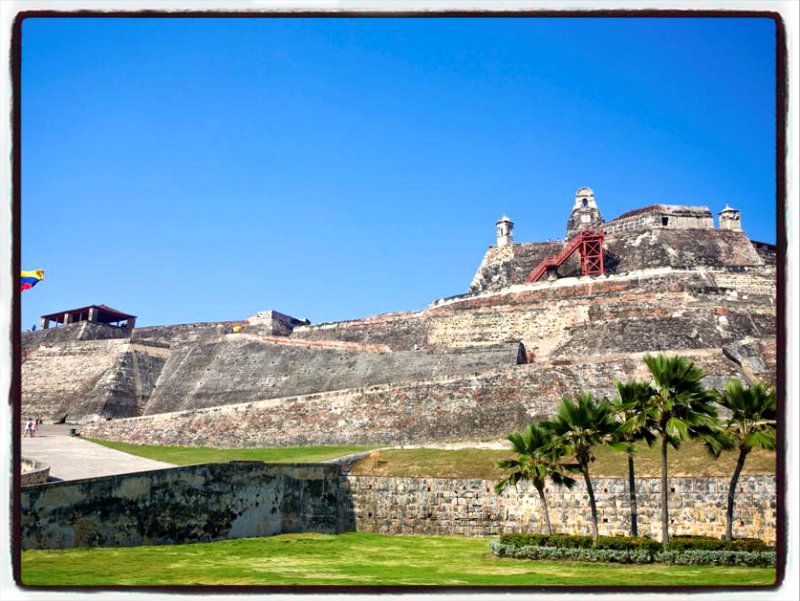
Castillo San Felipe de Barajas (San Felipe Castle)
5. Plan a day trip to Playa Blanca. Cartagena is located on the water, but if you’re looking for a beautiful beach, take a 30 minute speed boat ride over to Playa Blanca on the nearby Rosario Islands. The price of the trip starts at $40,000 COP ($20 USD). This does not include the $12,000 COP ($6 USD) park entrance fee. Prices increase from there depending on what the trip includes (i.e. lunch, snorkeling, etc.). You’ll be able to find many options at the marina. Save yourself money and a headache by purchasing tickets directly from the captain and avoiding middlemen with empty promises. Bring only what you need to the beach. If you feel like making a night of it, hammocks and rustic cabanas are available starting at $10,000 COP ($5 USD).
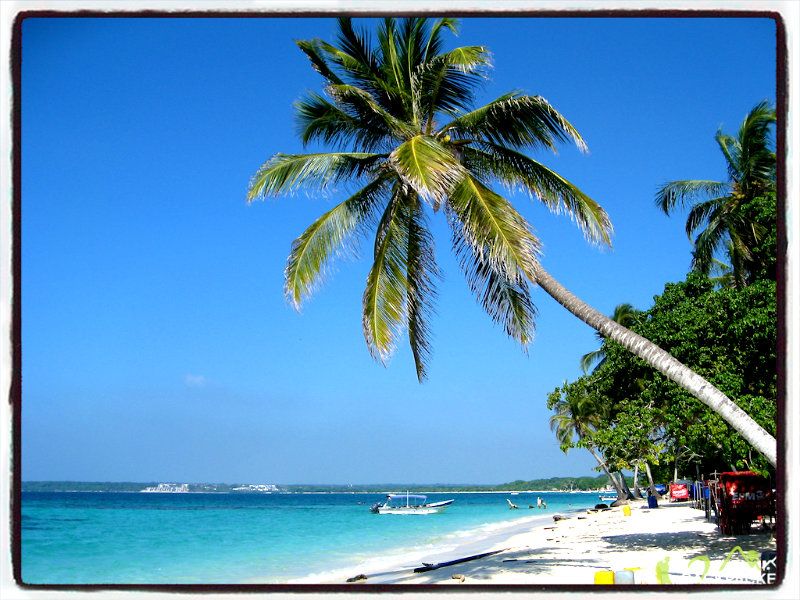
Playa Blanca
Well, that depends on what kind of backpacker you are…
If you enjoy a sense of security, quiet time after hours, old city charm, and quick access to historical sites,
Stay in the Walled City. Everything you need is in walking distance and its safe to walk at night! Great food, beautiful architecture, grocery shopping, souvenir shopping — its all here. The price of hostels start at $25,000 COP ($12.50 USD).
If you are traveling to meet other young people and are looking for the hot spot among backpackers…
Choose a hostel on Media Luna. Media Luna is a street 10-15 minutes (by foot) outside of the Walled City in an area called Getsemani. Hostels here are notorious for being the site of parties in the street until the wee hours of morning and attract young backpackers looking to have a good time interacting with other gringos. These hostels are a bit less taken care. Be sure to lock up your belongings, as bathrooms inside shared dorms are open to party-goers off the street. Hostel Mamallena is a popular option starting at $25,000 COP ($12.50 USD) for a shared dorm.
While Colombia isn’t exactly famous for any one type of cuisine, you’ll never go hungry here. A typical Colombian dish or “menu del dia” (menu of the day) consists of a small salad, rice, beans, meat, and soup and can cost $6,000-12,000 COP ($3-6 USD). While you’re in the city be sure to try an “arepa”, which consists of a grilled or fried homemade bun and is stuffed or topped with cheese. These can be found all over from different food carts and cost no more than $2,000 COP ($1 USD). Don’t miss Colombia’s native fruits, including the delicious “lulo” that can be blended into an amazing cocktail or eaten with a spoon. “Aguardiente” is the liquor of choice in Colombia. It is made from sugar cane and its closest English translation is “fire water,” so maybe be careful with that.
By the way, the water is drinkable in Cartagena.

Arepas

“Lulos” or Naranjillas
Hostel: $25,000 COP ($12.5 USD)
Food: $35,000 COP ($17.50 USD)
Activities: $12,000 COP ($6 USD)
Total: $72,000 COP ($36 USD)

That’s right. Colombia. I know what you’re thinking, “Hello!? Don’t you think you’re, like, going to get abducted by the drug cartel and… die?” That is, sadly, just about what I said to Brian two months ago when he suggested that we travel across this once-taboo South American country. Had I actually heard any recent information or news that would make me think Colombia was dangerous? Well, no. But rumor is as good as fact, right? Right??
Apparently, no. The common misconception that Colombia is unsafe for Americans is vastly outdated and things are continuing to improve. If we would’ve listened to my original reasoning, I would have missed out on three incredible weeks in a beautiful country. If you are considering a trip to or through Colombia, please, take advice from people who have been there and done it, not from people or articles that only offer old stereotypes!
In this guide, I’ll cover cities and places to visit, how to get there, where to stay, and safety.
Where to start:
Here is a great place to begin your Colombian adventure. Cartagena is a beautiful coastal city filled with rich history.
What to do in Cartagena : Enjoy the old Walled City. During the day there are plenty of museums to check out for $5-10 USD. The Gold Museum is air-conditioned and free — a great way to escape the heat for a little bit. Once the sun starts to set, take a walk along the wall itself. Its too hot for this between 11 AM and 5 PM, but when it starts to cool off, you can really appreciate the size of the wall and the history behind it. There is even a restaurant on the wall (albeit pricey by backpacking standards) where you can grab a drink and watch the sun set over the water.
About 30 minutes (by foot) outside of the city walls lies Castillo San Felipe de Barajas. Admission costs about $10 USD. Exploring the fortress-like castle is a nice way to spend an afternoon, although, sadly, the map and descriptions are only offered in Spanish.
If you’d like a day-trip outside of the city, take a 30-minute speedboat ride over to the nearby Rosario Islands and have a beach day on Playa Blanca. The ride starts around $20 USD.

Me at Castillo San Felipe de Barajas
Where to Stay in Cartagena : Inside the Walled City.
Staying inside the Walled City is the most relaxing way to spend time in Cartagena. The area is safe, even to walk at night, and there are loads of attractions nearby, although you may face a longer walk if you’re looking for nightlife.
If you’re looking for the hot spot among young backpackers and don’t mind a little after-hours noise (… who am I kidding? Its loud as Hell and the street is packed), pick a hostel on Media Luna. Media Luna is a street about ten to fifteen minutes walking distance outside of the walled city. Hostel Mamallena is popular party hostel and helps arrange trips to sail to Panama City, even if you are not a guest.
Safety in Cartagena : The Walled City is safe to anyone traveling with common sense. Keep an eye out for pickpockets and don’t try to buy drugs. While I felt totally safe in Cartagena, we met someone who left town $1,000 USD poorer after a drug transaction gone wrong. Once outside of the city walls (i.e. Bocagrande or Getsemani), get around by taxi at night.
Check out our post on Backpacking Cartagena for more info!
Next stop: Take the 14 hour night bus to Medellin. The night bus is safe and surprisingly comfortable. For a more relaxing ride, be sure you are equipped with earplugs! You will want them when the loud music is still going strong at 3:00 AM. Colombian night buses are also notorious for their icy cold air conditioning. You’ll want to wear warm clothes and bring a blanket. The bus costs about $52 USD before negotiation. IMPORTANT: Colombian bus prices are always negotiable! If they ask you for $52, maybe offer them $30 then meet in the middle.
A true city on the rise. It has been over 20 years since the death of Pablo Escobar, marking the end of the world-known cocaine trafficking and political corruption era. While Medellin was once the center stage for corruption and violence, the city is now in the midst of a striking comeback. Medellin is Colombia’s second largest city and boasts an incredibly easy-to-navigate Metro system.
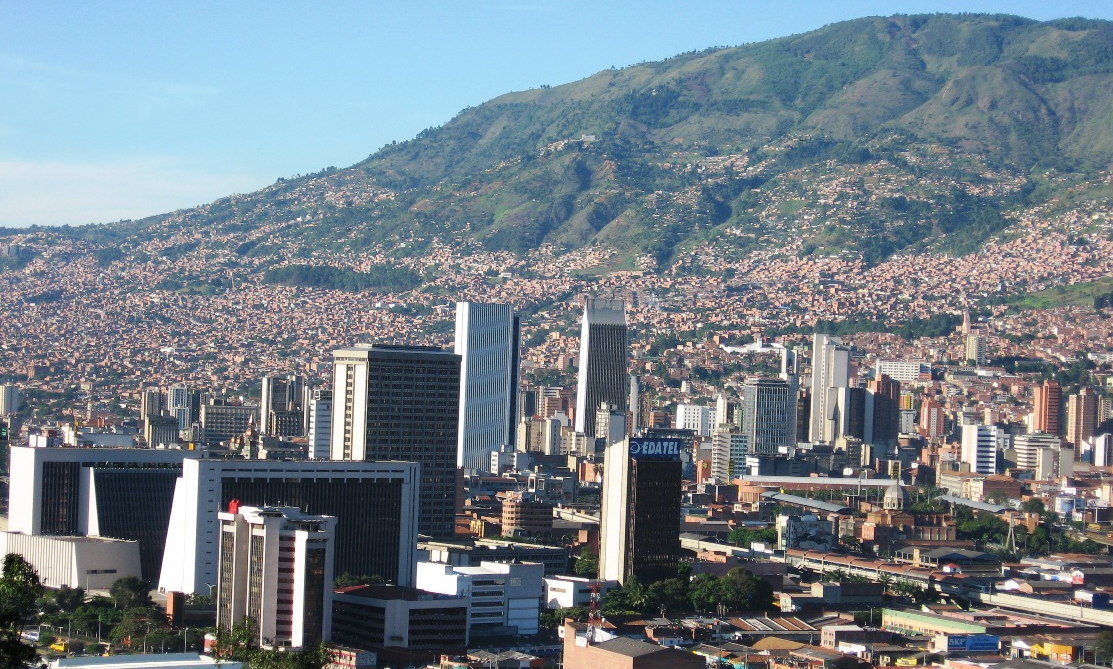
What to do in Medellin : There is an unlimited amount of things to do in this beautiful city. One of my favorite activities was visiting the Museo de Antioquia, which features dozens of Colombian-native, Ferdinand Botero’s paintings and much, much more. Other activities include fabulous free walking tours, paragliding, touring Pablo Escobar’s mansion (spoiler alert: it’s been bombed), taking the cable car up the mountain, visiting the city’s Botanical Garden, or taking it easy during the day to get ready for a big night in El Poblado, the city’s center for nightlife.
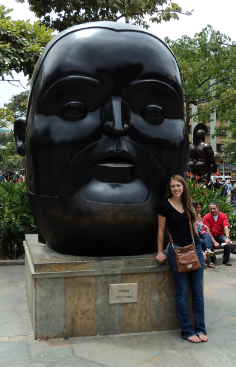
Enjoying a Botero Sculpture
Spending: The Metro system lets you easily get around without spending much money. A single ride only costs $1,800 COP (less than $1 USD). The local grocery stores are Euro Markets and Exitos. Save money during nights out in El Poblado by bringing your own drinks. Travelers and locals party and drink in the park square located in the middle of the bar/ club area.
Where to stay in Medellin : El Poblado.
This is the section of Medellin where most young travelers flock to and is close to the nightlife. The Tiger Paw is a popular hostel at $10 for a dorm. For a less touristy experience, stay in Laureles. A great hostel in this middle class section of Medellin is the Buddha Hostel at $12 per night.
Safety: As is the case in any big city, you’ll want to be careful here. Try not to flash around passports, cameras, or cell phones. Always have your hostel or restaurant call you a cab after dark.
Next Stop: Take a 2 hour bus to Guatape. The cost is about $6 USD before negotiation.
A great area to escape the city for a weekend! Guatape has a lot to offer tourists and is beautifully set on Lake Guatape, a man-made reservoir. The hydro-electric dam supplies power to most of Colombia, as well as some neighboring countries.
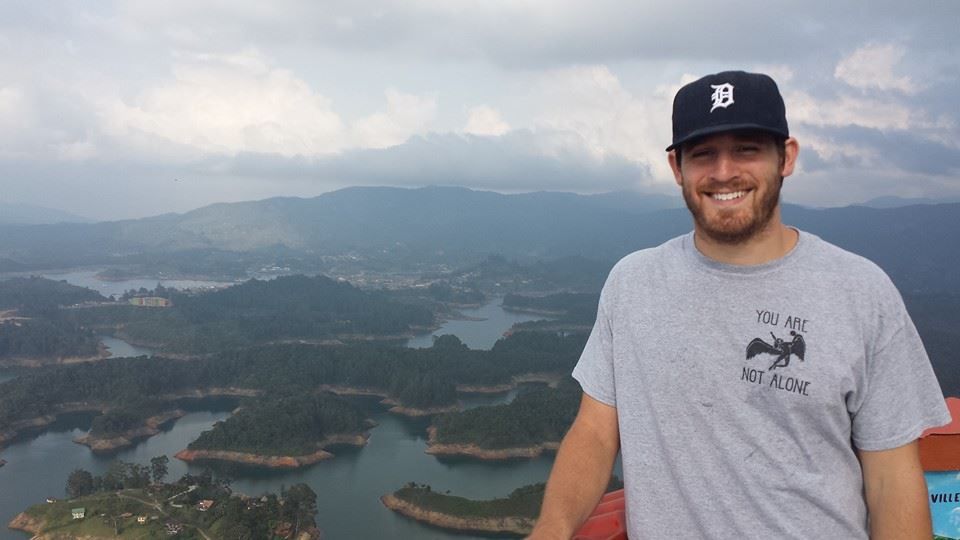
Brian overlooking Lake Guatape from “The Rock of Guatape”
What to do in Guatape : Come for the weekend (or longer if you decide you love it, like we did!) and participate in the many activities catered to Colombian and foreign tourists. Take a boat ride on Lake Guatape. Captains will take you past one of Pablo Escobar’s (bombed) mansions and over the sunken village that was flooded to create the reservoir. You can still see the steeple of an underwater church! Be sure to wear your swimsuit and take a dive into one of the lakes warm pools.

Pablo Escobar’s Finca in Guatape
Climb La Piedra del Peñol (“The Rock”). It takes 45 minutes to walk from town and the cost of admission is around $4 USD. The view from the top is worth every step!

The Rock
You can also kayak, explore the small town and its interesting cuisine, or find a quiet place to practice yoga.
Where to stay in Guatape : The Lakeview Hostel. The bus will drop you off right down the road from this $10 USD hostel. The staff here speaks English and are very helpful with arranging activities for their guests. They also offer an option to work for them in exchange for free housing!
Next Stop: Salento. It takes a bit of patience to get this out-of-the-way town in the Coffee Region. I recommend taking the night bus since it is safe — save money on a hostel and sleep during “wasted” travel time! Take the last bus from Guatape (6:30 PM) back to Medellin (2 hours). Once in Medellin, you will have to take a taxi from the North Terminal to the South Terminal (Terminal del Sur). Our taxi cost around $6 USD. Next, board the last bus to Armenia (11:00 PM) which is $20 USD before negotiating. This bus takes around 6-8 hours depending if there are accidents on the road. Prepare yourself for a night of twisting and turning up and down mountain roads! Note: Bring a blanket – the bus gets icy cold! From Armenia there are buses to Salento (45 minutes) throughout the day for only $1.50 USD
This small town is set in Colombia’s Zona Cafetera (Coffee Zone), which is a vital to Colombia’s economy. Salento is a charming town of less than 8,000 residents and a great spot for backpackers and vacationers to enjoy.
What to do in Salento : Relax! Enjoy the views! Practice yoga on a mountain overlooking a valley of wax palm trees! And once you’ve taken it all in, visit a coffee plantation – I recommend Finca de Ocasa ($4 USD)! Learning about the coffee we consume daily was incredibly interesting to me. From the growth, to the processing, to which well-known distributors select which grade of coffee, I was completely absorbed for the entire tour.

Brian picking coffee beans
If you’re itching for your next trek, hike through the Valle de Cocora (Cocora Valley). This trek can be completed in 6-8 hours and offers views of the rare and beautiful Wax Palm trees. There is no entrance fee, so this is a free activity!
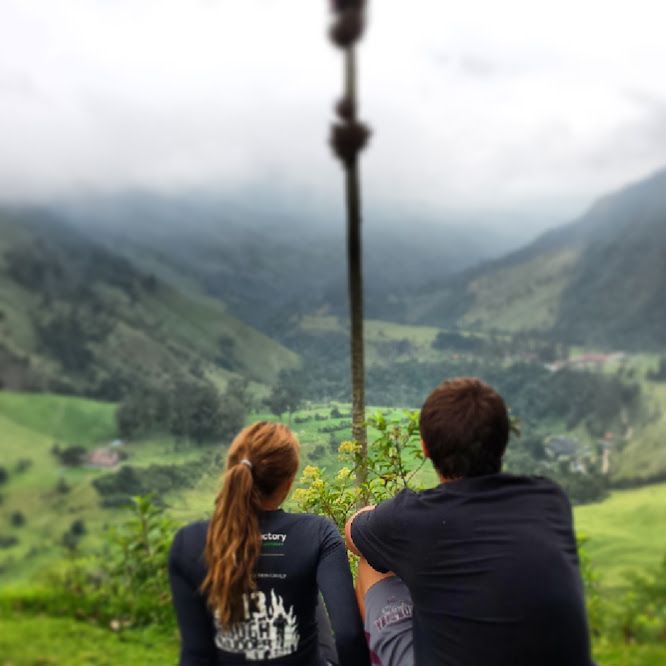
Pausing in our trek of Cocora Valley
Where to stay in Salento : We very happy with our accommodation at La Serrana Eco Farm and Hostel ($11.50). It is set 30 minutes from town (by foot) on top of a hill overlooking beautiful surrounding valleys. La Serrana offers free breakfast, delicious and inexpensive communal dinners, and tons of DVDs for watching (in English!). La Floresta Hostel is another option that is more budget-friendly, starting at $8.75 USD and located right in town. La Floresta is much more dated than La Serrana, but offers mud boot rentals for hiking Valle de Cocora as well as free maps and tourist information.
Next stop: Cali. Take the bus back to Armenia. If you’re traveling during a busy time, keep an eye on your bags here! Several thefts have been reported in the Armenia bus station. From Armenia, board the bus to Cali ($10 USD). This bus takes around 4 hours.
This exciting city is not to be missed! Known to be the Salsa Capital of Colombia, and possibly the world, Cali can inspire even travelers with two left feet to get up and dance.
What to do in Cali : People love Cali for the culture of their nightlife. Practice your salsa skills during the day and let them loose when the sun goes down at one of Cali’s numerous salsa clubs. Many hostels offer free lessons. Private instruction is also available for a small hourly fee ($6 USD). Take at least one lesson while you are here, whether you are a dancer or not. You won’t regret it!
The Cali Zoo is a fun daytime activity in Cali and there are a few beautiful churches worth a visit, as well.
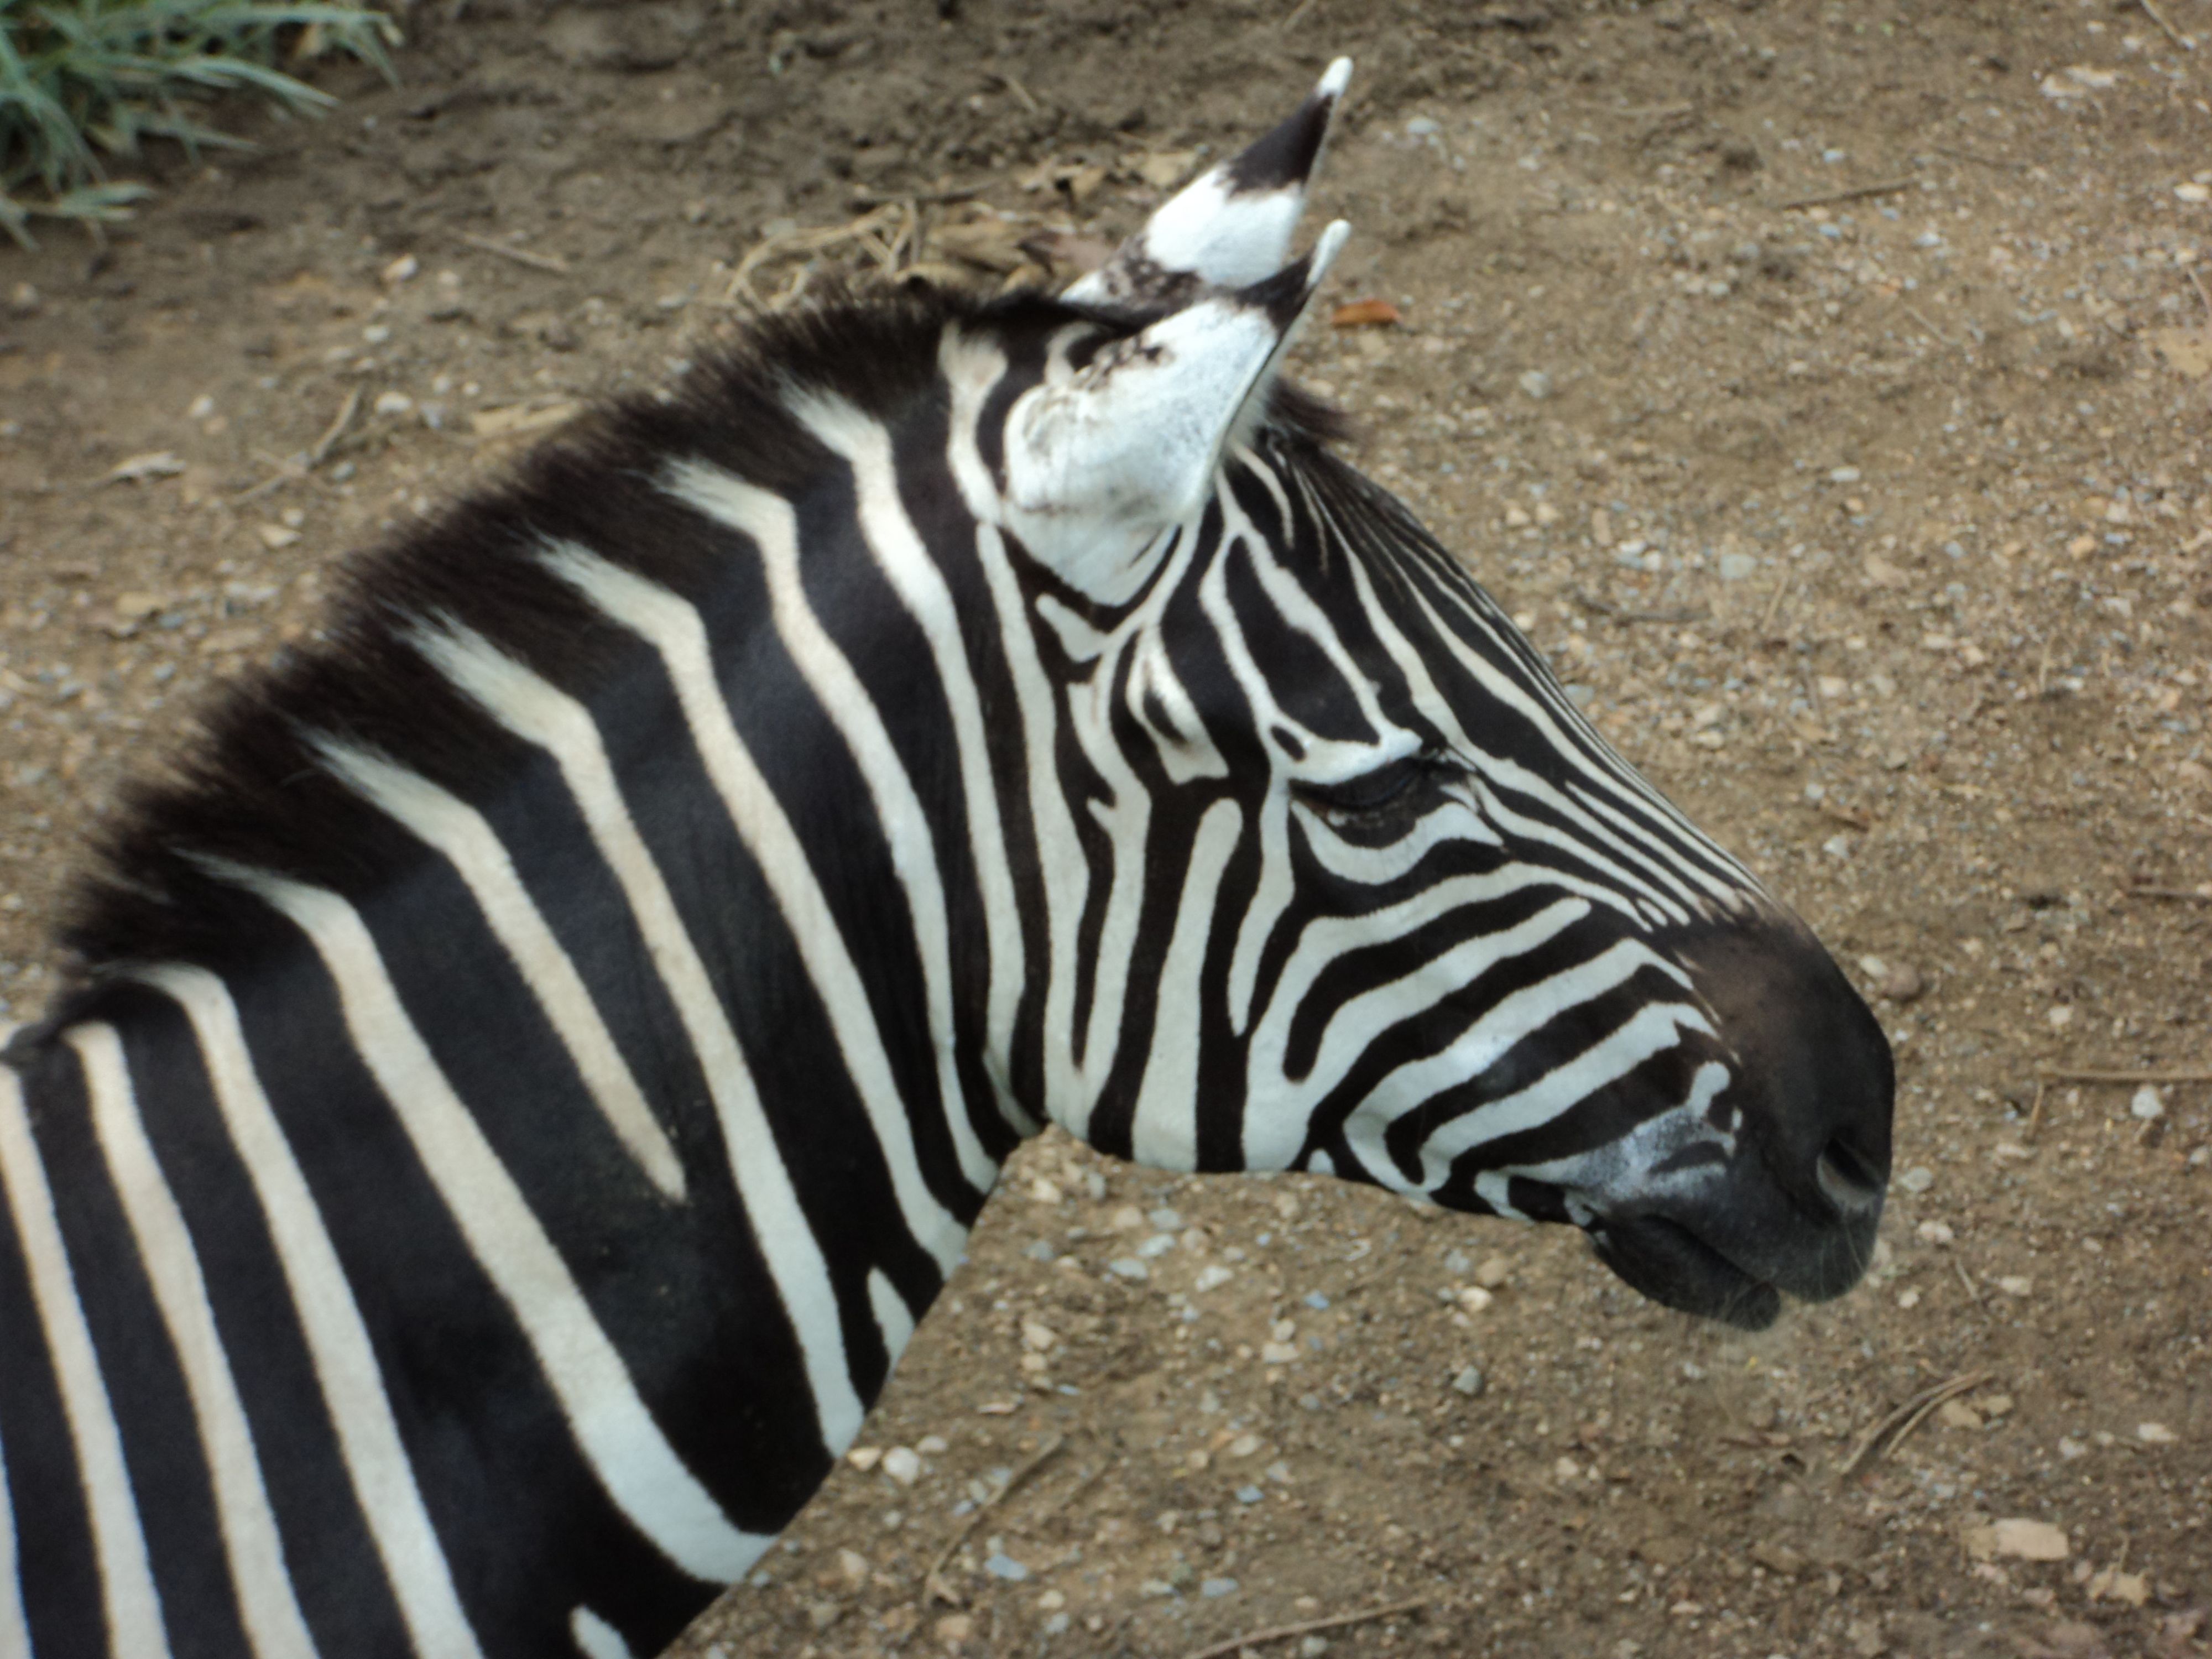
Zebra at the Zoo!
Where to stay in Cali : Hostel Viajero in the historical neighborhood of San Antonio. I was so impressed with this $12 USD hostel. Free daily salsa classes, free yoga classes, free breakfast, and the list goes on – all on top of a great atmosphere.
Safety: Cali is a big city and requires taking extra safety precautions. Always have your hostel or restaurant call a cab for you, as cab robberies do often happen, and ALWAYS take a cab after dark.
Continuing on to Ecuador? Keep in mind that night buses to the Southern Colombian border are NOT safe right now and are sometimes held up by armed bandits! Instead, spend the night in the border town of Ipiales, Colombia and check out this beautiful church!
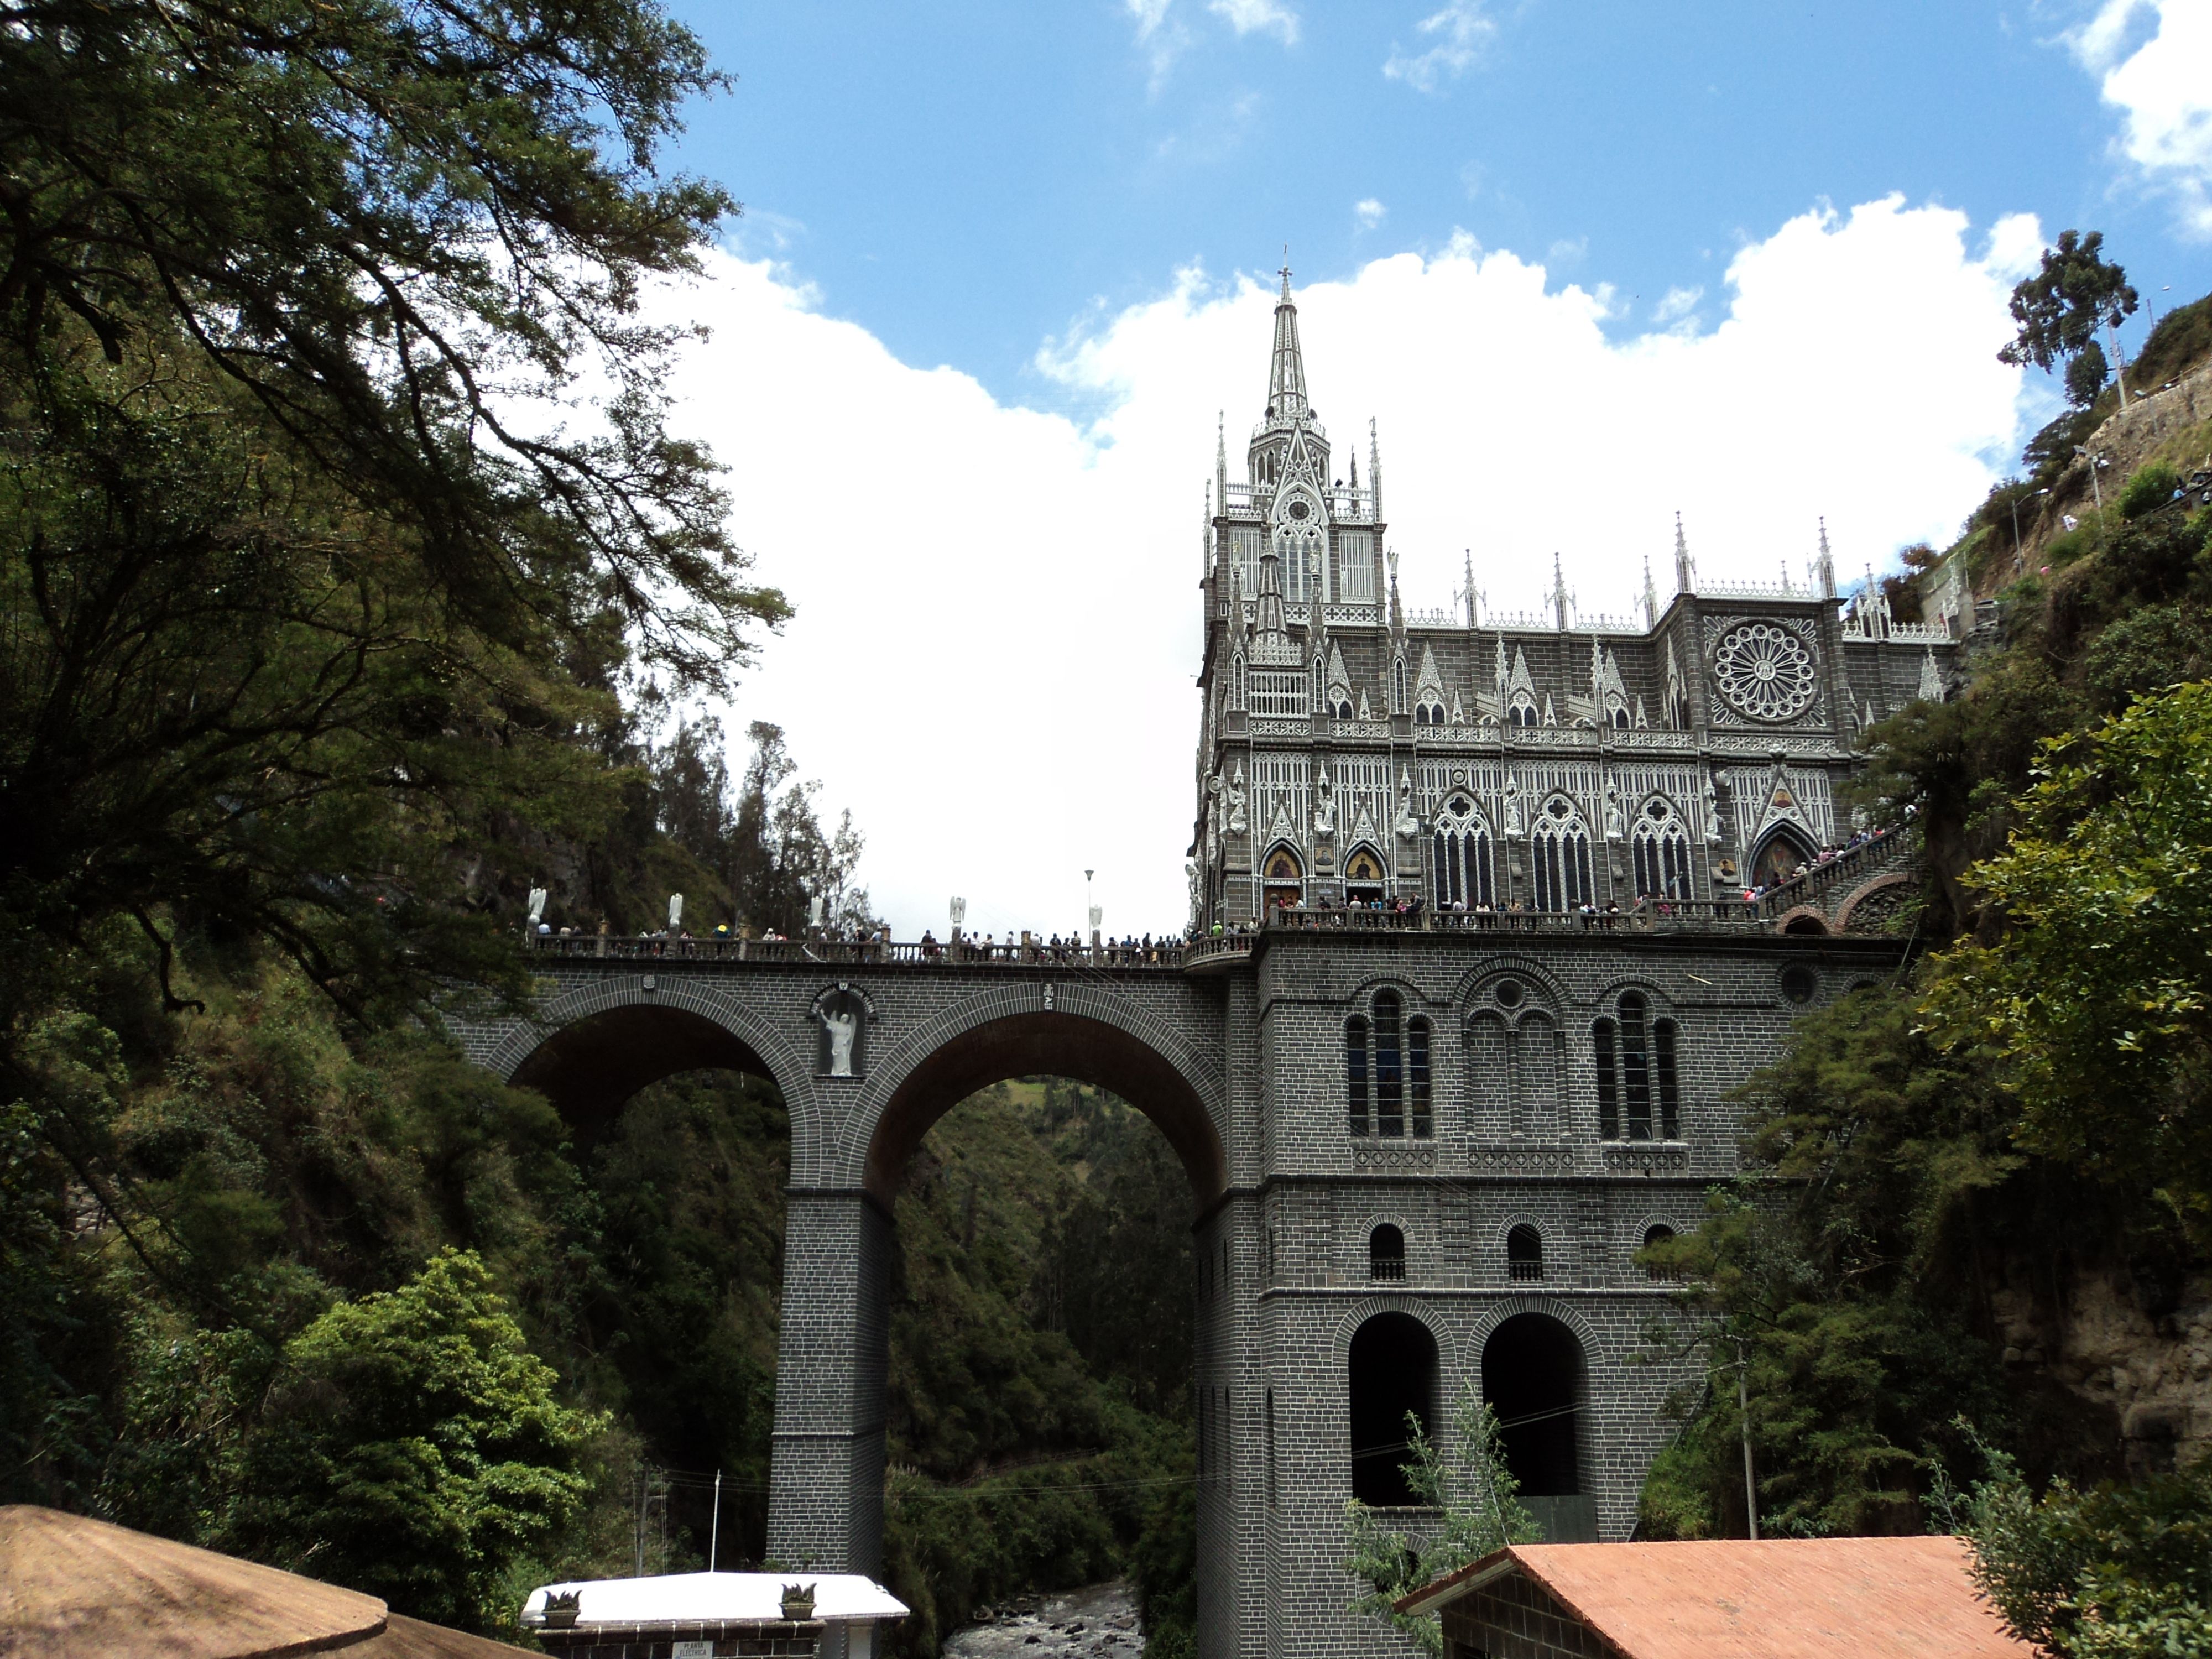
Las Lajas Sanctuary in Ipiales, Colombia
If you’re planning a trip to Colombia and have any questions, we would love to help! Leave a question in the comments section below.
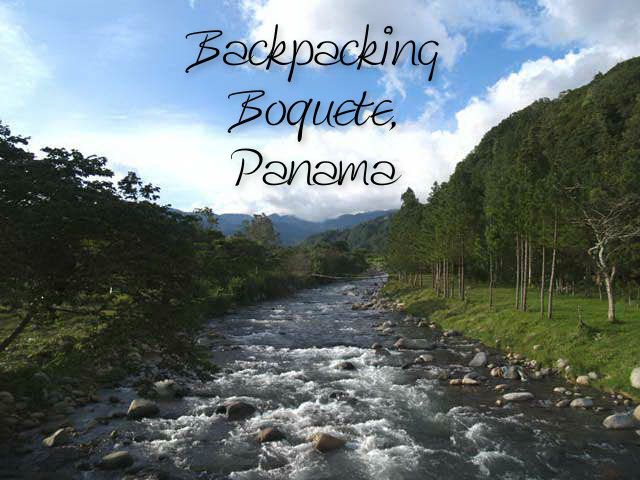
Boquete, Panama : How to get there and what to do:
Boquete, Panama proved to be the perfect change of pace from the hot sun of Costa Rica.
Boquete is located in the hills of Northwest Panama, and it’s a great spot for all types of travelers. While this mountain town is a hub for backpackers traveling through Panama, tourists and retirees have also found Boquete to be an ideal place to relax and take in some nature. We loved our five day stay here and look forward to coming back.
The heart of this small city is a few streets offering shops, tour centers, markets and restaurants. There is a beautiful bridge that crosses over the Caldera River – a great place to spend a day reading and relaxing.

A view of the small mountain town
From Costa Rica: After six hours of traveling we arrived in Boquete, Panama. We started in the Osa Peninsula in Puerto Jiminez, Costa Rica. We took a ferry across the Golfito Bay to a town called Golfito, Costa Rica. From Golfito we jumped on a local bus headed to “Canoas” or Paso Canoas, Costa Rica, the west coast border town between Costa Rica and Panama.
We then had to go through the somewhat challenging process of immigration. Panama expects you to have an outbound departure ticket when you come into their country. We think it’s a bit of a scam; they either make you buy a bus ticket back to San Jose, Costa Rica ($14) or a plane ticket back to your home country. At an internet café in Canoas we decided to buy a flight back to the US – ten minutes after we got our stamp we canceled the reservation.
We crossed the border into Panama, a country that looks like a “sister country” of the United States. The highways are new and beautiful. The buses or “collectivos” are jitney-style and offer air conditioning. It’s a pleasant change from some of the more rural aspects of traveling through Costa Rica.
We jumped on a bus from the border to David, Panama, a transportation hub located in the northwest of Panama. After about five minutes at the station, we boarded a bus for a 1 hour ride to Boquete.
If you are coming from San Jose, Costa Rica, there is a morning bus from the Tracopa terminal that leaves at 7:30AM ($15-20). This bus takes about 9 hours to get to David.
If you are coming from Panama City, Panama, there are daily flights to David which are about $100 each way. There are also both day and night buses from the Albrook Terminal. Look to spend between $15 and $20 on the bus from PC.
Many backpackers come from Bocas Del Toro, Panama. There are shuttles that run direct between Bocas Del Toro and Boquete ($29). We suggest you bus to David and take a bus from David to Bocas ($10). This route adds an extra hour or two to your travel time, but is an easy opportunity to save money.
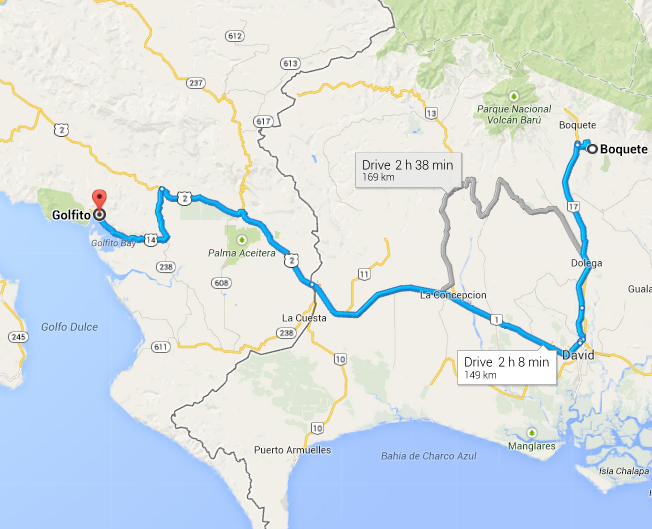
This is the route we took to get to Boquete from Costa Rica
The Gaia Hostel. We had an amazing experience at this top rated hostel ($13). Its clean, comfortable, and spacious. Amenities include free wi-fi and inexpensive laundry service — but not much in terms of tours and activities. If you’re looking for help arranging tours or excursions, take a walk to Hostel Mamallena, located in the Central Park square.
Word from the wise: always bring ear plugs and a sleeping mask to any hostel!
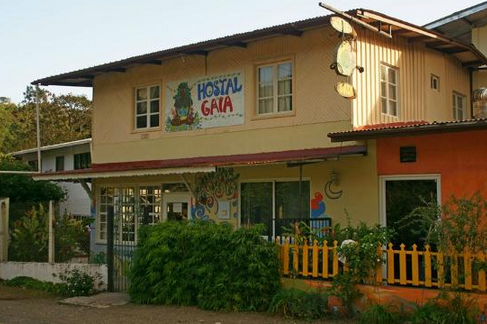
A view of Hostal Gaia
1) Hike Volcan Baru.
Kate wrote a great guide about our experience trekking Volcan Baru. Check it out in the above link.
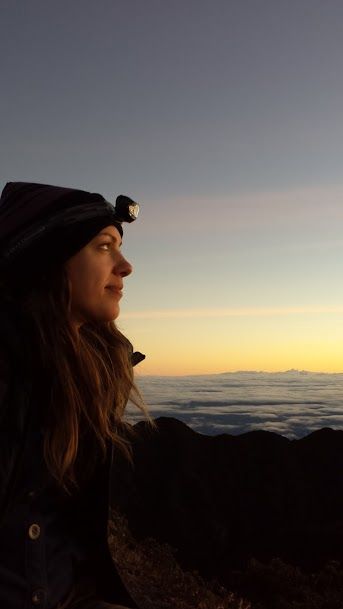
Kate at the top of Volcan Baru!
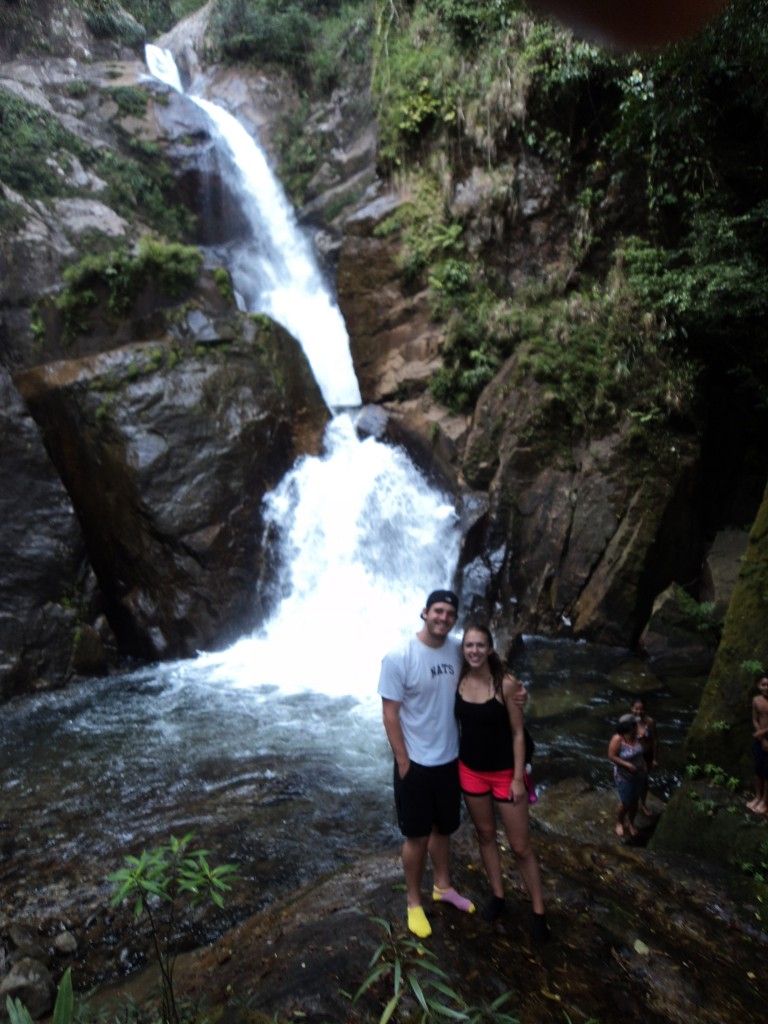
2) Visit The Lost Waterfalls
This fantastic hike through a cloud forest that will bring you to three gorgeous waterfalls. It takes 1-3 hours to complete the trek depending on your level of fitness. On the way to the falls it is very common to see monkeys, sloths, and fascinating birds including quetzals.
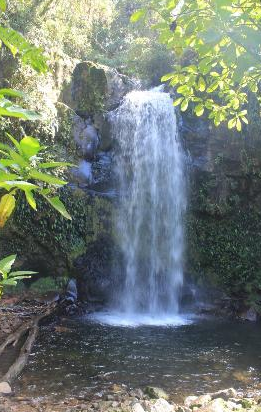
One of the three waterfalls on the short trek
3) Boquete Coffee Tour
Many people head to the fincas of Dos Jefes, Kotowa or Café Ruiz. All of these are beautiful coffee plantations with plenty to see. You will learn a lot during one of these sessions. The process of how your favorite brewer selects the coffee they serve may or may not scare you into switching to tea. We were impressed with the level of English at Dos Jefes. If you are on a short trip, this is not to be missed in Boquete.
4) Cliff jumping and climbing at the Mini Canyon
A lot of backpackers love this day trip provided by Hostal Mamallena. Boquete features some incredible rock formations that are great for climbing and cliff jumping into the water. Bring sunscreen as the sun is very powerful in this area.
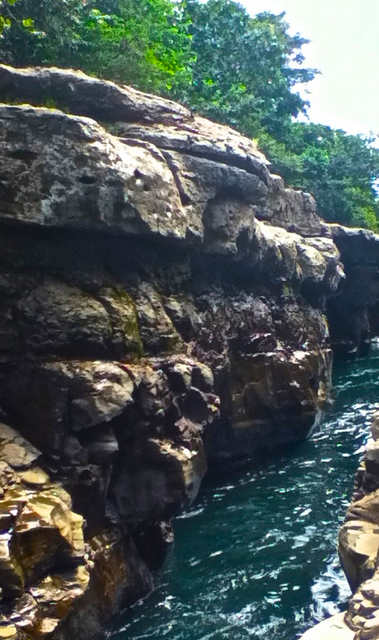
A view of the Mini Canyon in Boquete
5) Visit the Hot Springs
There are four or more pools at the Caldera Hot Springs and they are all-natural!! Skip the tour guide on this one and take a taxi — be sure to also arrange for a ride home. Entrance to the hot springs costs $5. Tip: Go in the early morning or in the late afternoon as the water gets very hot during midday.
Hostel: $11 USD
Food: $5-$10 USD
Transportation: $2 USD
Traveling to Panama or Boquete, Panama for the first time? Post a question in the comments section below, we’ll respond with advice!

The Osa Peninsula, Costa Rica : How to get there and what to do:
After days of a laid-back jungle lifestyle, surrounded by the most beautiful natural sights, I’m happy to report that the Osa Peninsula on the South Pacific region of Costa Rica is a must-see when traveling in Costa Rica or through Central America. The tropical rainforest and all of its inhabitants make this a truly unforgettable destination.
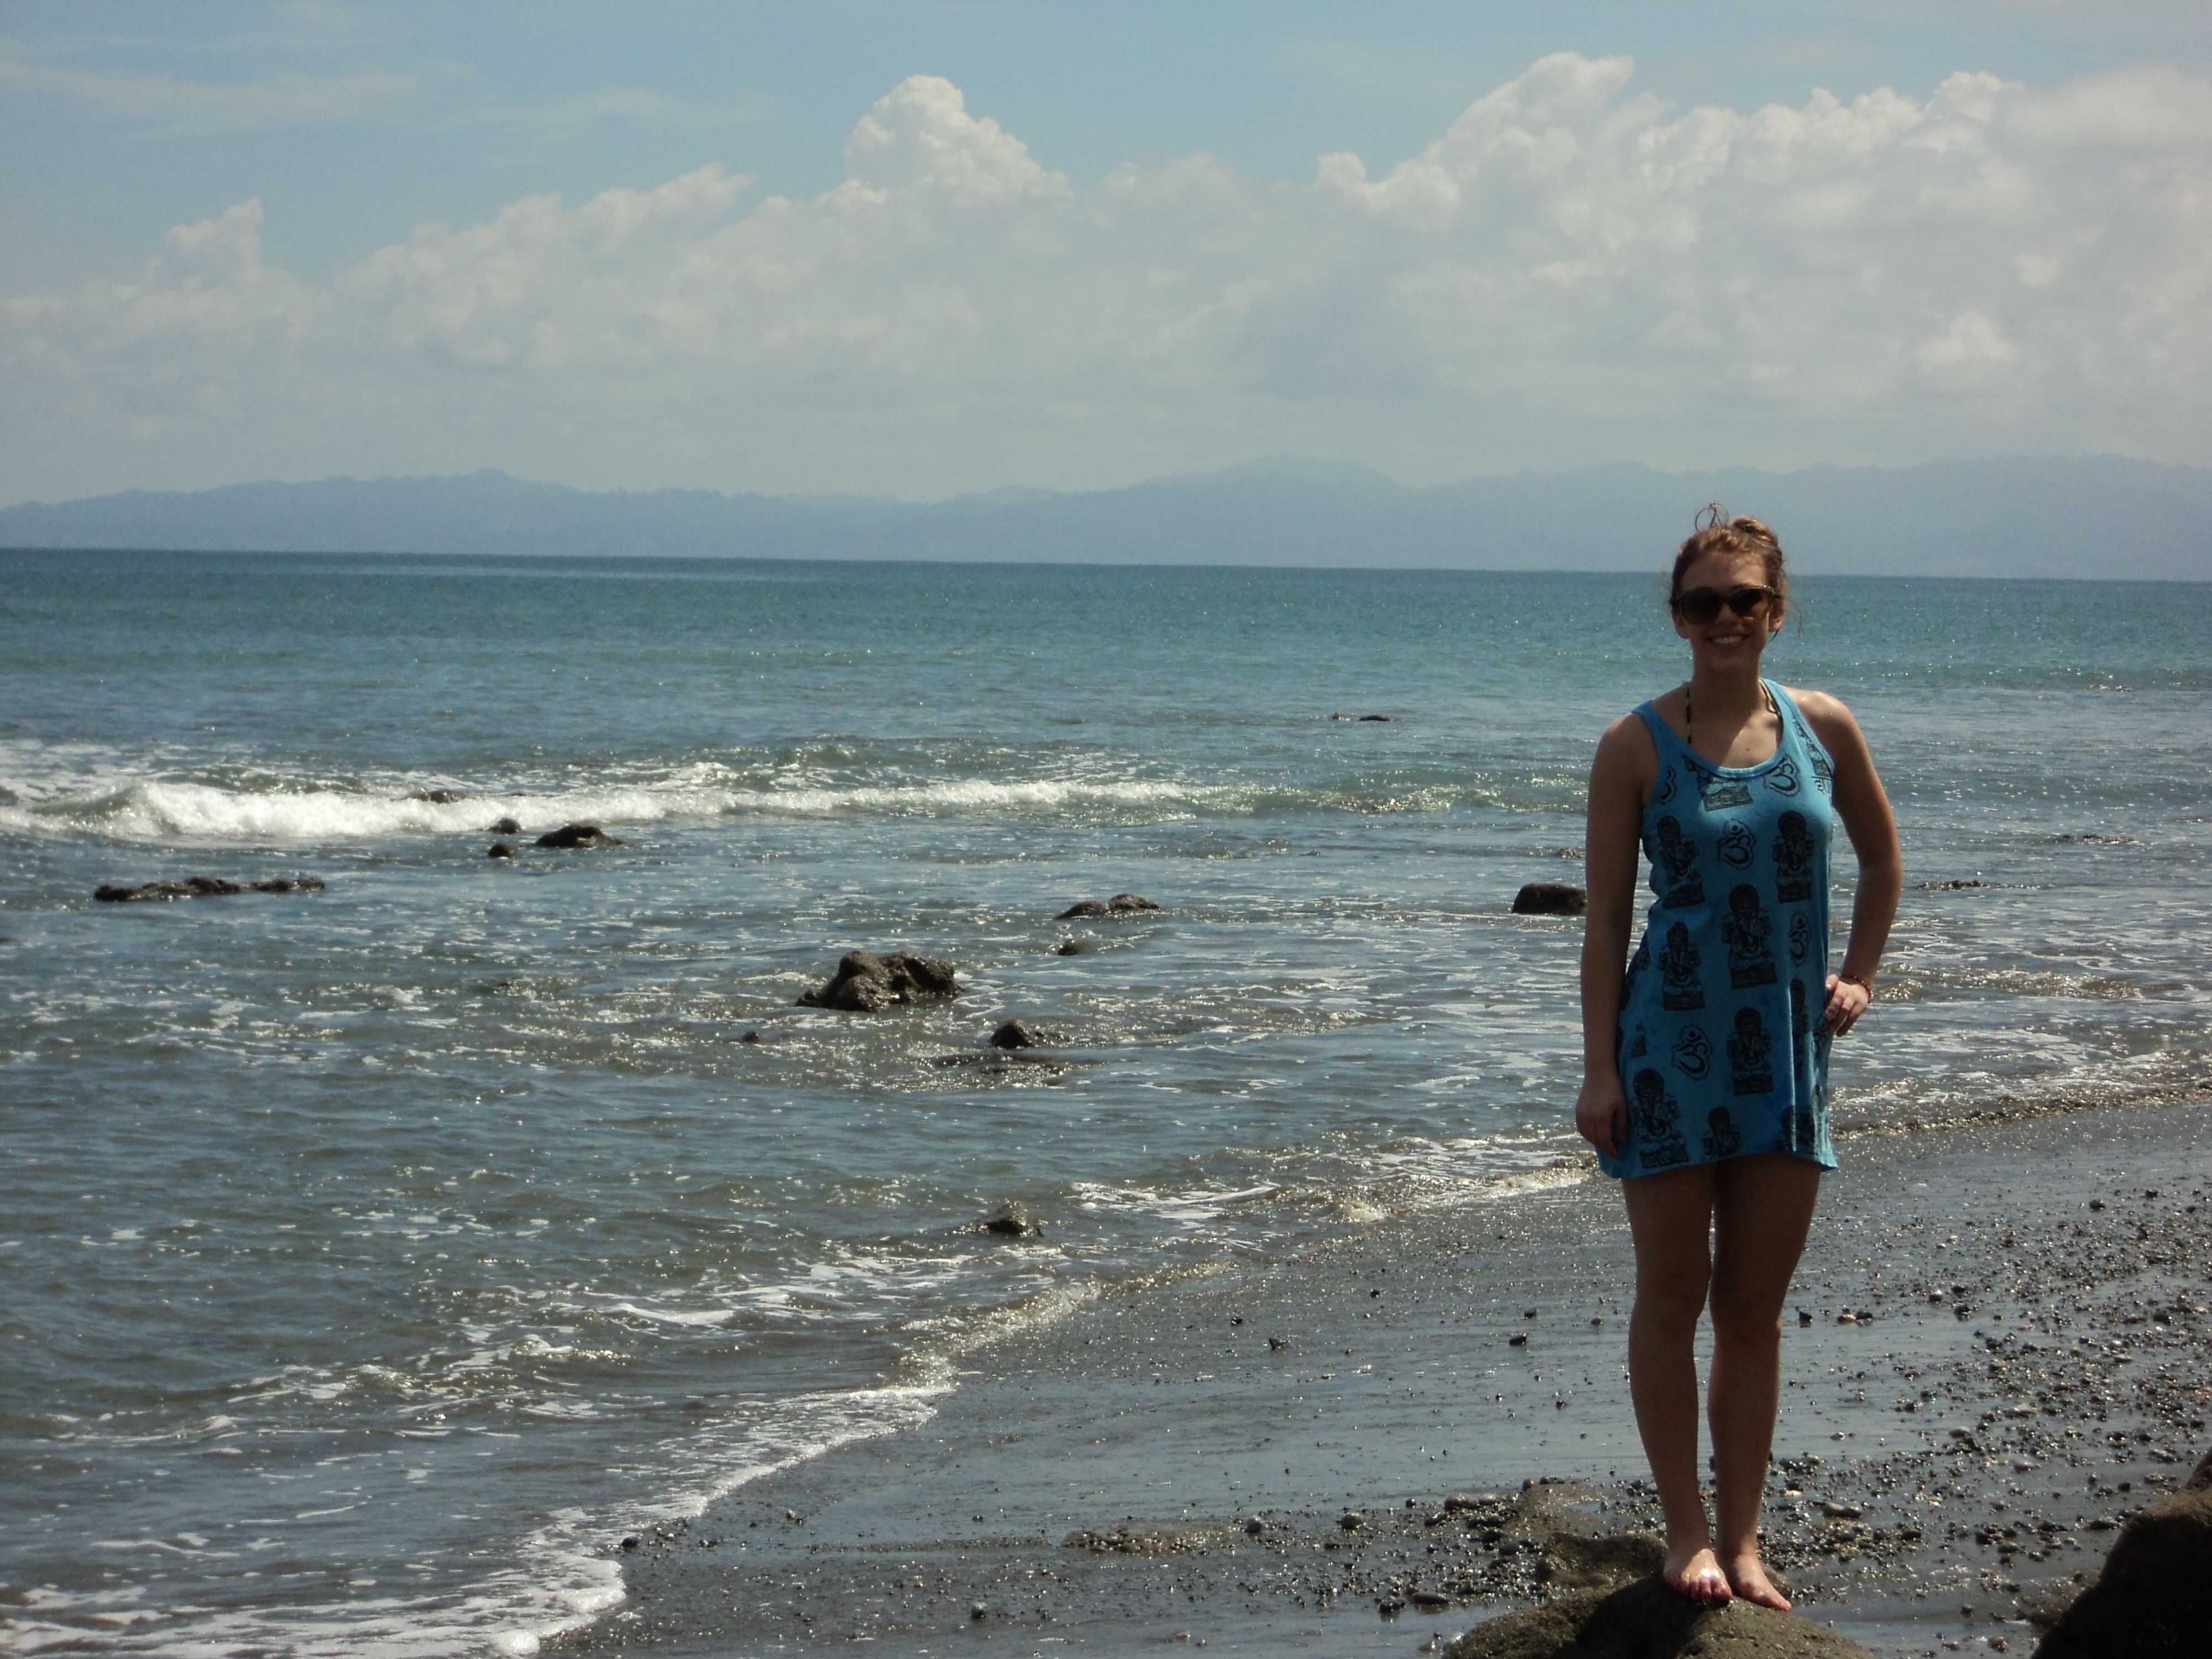
Kate enjoying a deserted beach @ the Osa Peninsula
How do you get to what National Geographic calls the “most biologically intense” place on Earth? Its easier than it sounds, although a bit of a long journey. The easiest, most direct, and affordable way for backpackers to get there is to begin in San Jose, the transportation hub of Costa Rica.
We flew from NYC through Fort Lauderdale into San Jose and spent one night in the city. The airport is a ways out of town, and taxis can be pricey, but the city bus is only about $2 USD! Bypass all of the aggressive taxi drivers at the airport, walk past the parking garage, and out the main entrance. When you get to the road, turn right and walk for about a minute. You’ll see a few buses on the side of the road. All you have to say is “San Jose” and they’ll direct you to the correct bus. The ride is about 25-35 minutes. The Van Gogh Hostel ($14 USD) was a nice, clean and secure, basic hostel in a safe part of San Jose for a travel day. The host, David, is very helpful!
Once in San Jose, take the 8:00 AM bus to Puerto Jimenez. Finding the bus station is a little tricky on your own! The bus station itself doesn’t open until just before 8:00 AM, when the bus leaves, and there is only a tiny sign that says “Transportes Blanco” on a building on an out-of-the-way street. Since our español is pretty rusty, we found the easiest way to find the station was to catch a cab at the Holiday Inn near the center of town. The short cab ride was about $3 USD.
The bus cost 7,500 CRC (about $15 USD) each for obvious gringos. Maybe a bit cheaper if your nationality isn’t so obvious. Buses leave at 8:00 AM and 12:00 PM. Our bus took 9.5 hours so we were very glad we took the 8:00 AM departure. Be prepared for lots of stops! The bus made 2 bathroom/rest stops and about 20 other stops, picking up locals that were walking on the road. Our bus was also delayed due to an accident.
The bus ride was long, but we really enjoyed getting to see so much of Costa Rica along the way! The scenery is beautiful.
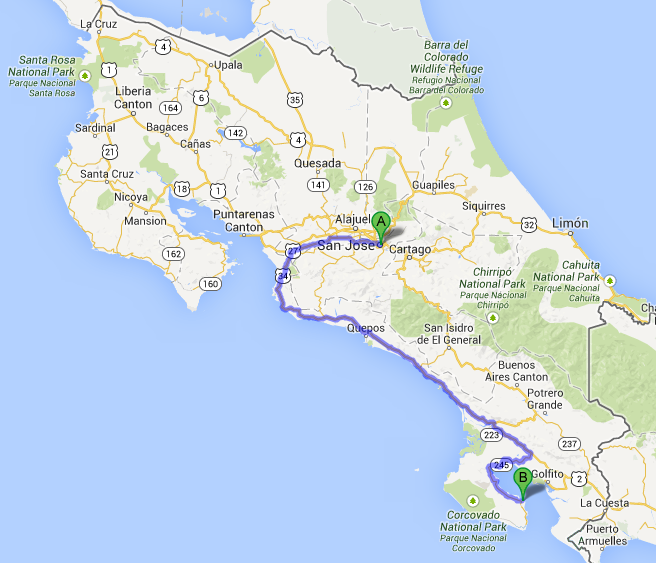
This is the bus route we took to get down to the Osa Peninsula and Puerto Jimenez
The Bello Horizonte Jungle Hostel! We couldn’t have been happier with our choice to stay here! We picked it for the price ($14.76 USD), but ended up with some of the best experiences we’ve had so far on our trip. Peter and Lucia are the owners of this newer hostel and they are delightful. Peter, from California and English-speaking, picks you up from the bus station when the bus comes arrives and drives you to the grocery store to pick up groceries for your stay. The hostel is about a 15 minute drive or 45 minute walk from Puerto Jimenez, tucked into the secondary rainforest.
We met and became friends with travelers from Hungary, Russia, Germany, and France as well as the Tican staff. In the mornings we would wake up to little monkeys swinging around the trees right above you and being feet away from vibrant toucans in the clubhouse!
The accommodations are pretty rustic – electricity and Wi-Fi are only available in the clubhouse and only available from 5:30-10:00 PM! The rooms are open-air cabanas with a roof, 3 walls, and mosquito nets over the beds.
Word from the wise: bring a headlamp or a flashlight! The jungle gets dark at night. Duh. I also strongly recommend bug spray!

Our Cabina at Bello Horizonte Jungle Hostel
1. Corcovado National Park. This is the main reason people come to this area. The national park covers most of the Osa Peninsula and is a serious trek on which you can find over 400 species of birds alone and 10% of all of the mammals that exist in the Americas. Be prepared to carry all of your food and water on your back for this 1-2 full day trek! A $10 permit and a guide are now required to enter the park. This website’s tours have great reviews: Osatravel.com.
The trips can be expensive on a backpacking budget, but if you’re in Costa Rica, do you really want to miss it? Tip: Make sure you’re up to it! This is a strenuous trek and should not be taken lightly. Have you heard of Golden Orb Spiders? You will be sharing the forest with them.
Corcovado National Park is what draws people from all over the world
2. Visit the Osa Wildlife Sanctuary. If the cost of the park guide is a bit over budget or if you haven’t trained for the 21 km trek into Corcovada, you can still visit the exotic animals at the Osa Wildlife Sanctuary. The sanctuary is open to visitors between 9-11 AM and the entrance fee is $25 per person. Make sure you do your research first, as there are restrictions on what is allowed inside.
3. Walk the secondary rainforest trails! You’re already in the rainforest, now explore it! Our hostel had trails all over the 10 acre property (at no cost to us), leading all over the jungle, down to little creeks. It was a blast wandering around, taking pictures and spotting sloths and different kinds of monkeys and tropical birds. Some local families offer guided tours around their properties for a small fee (about $5 USD).
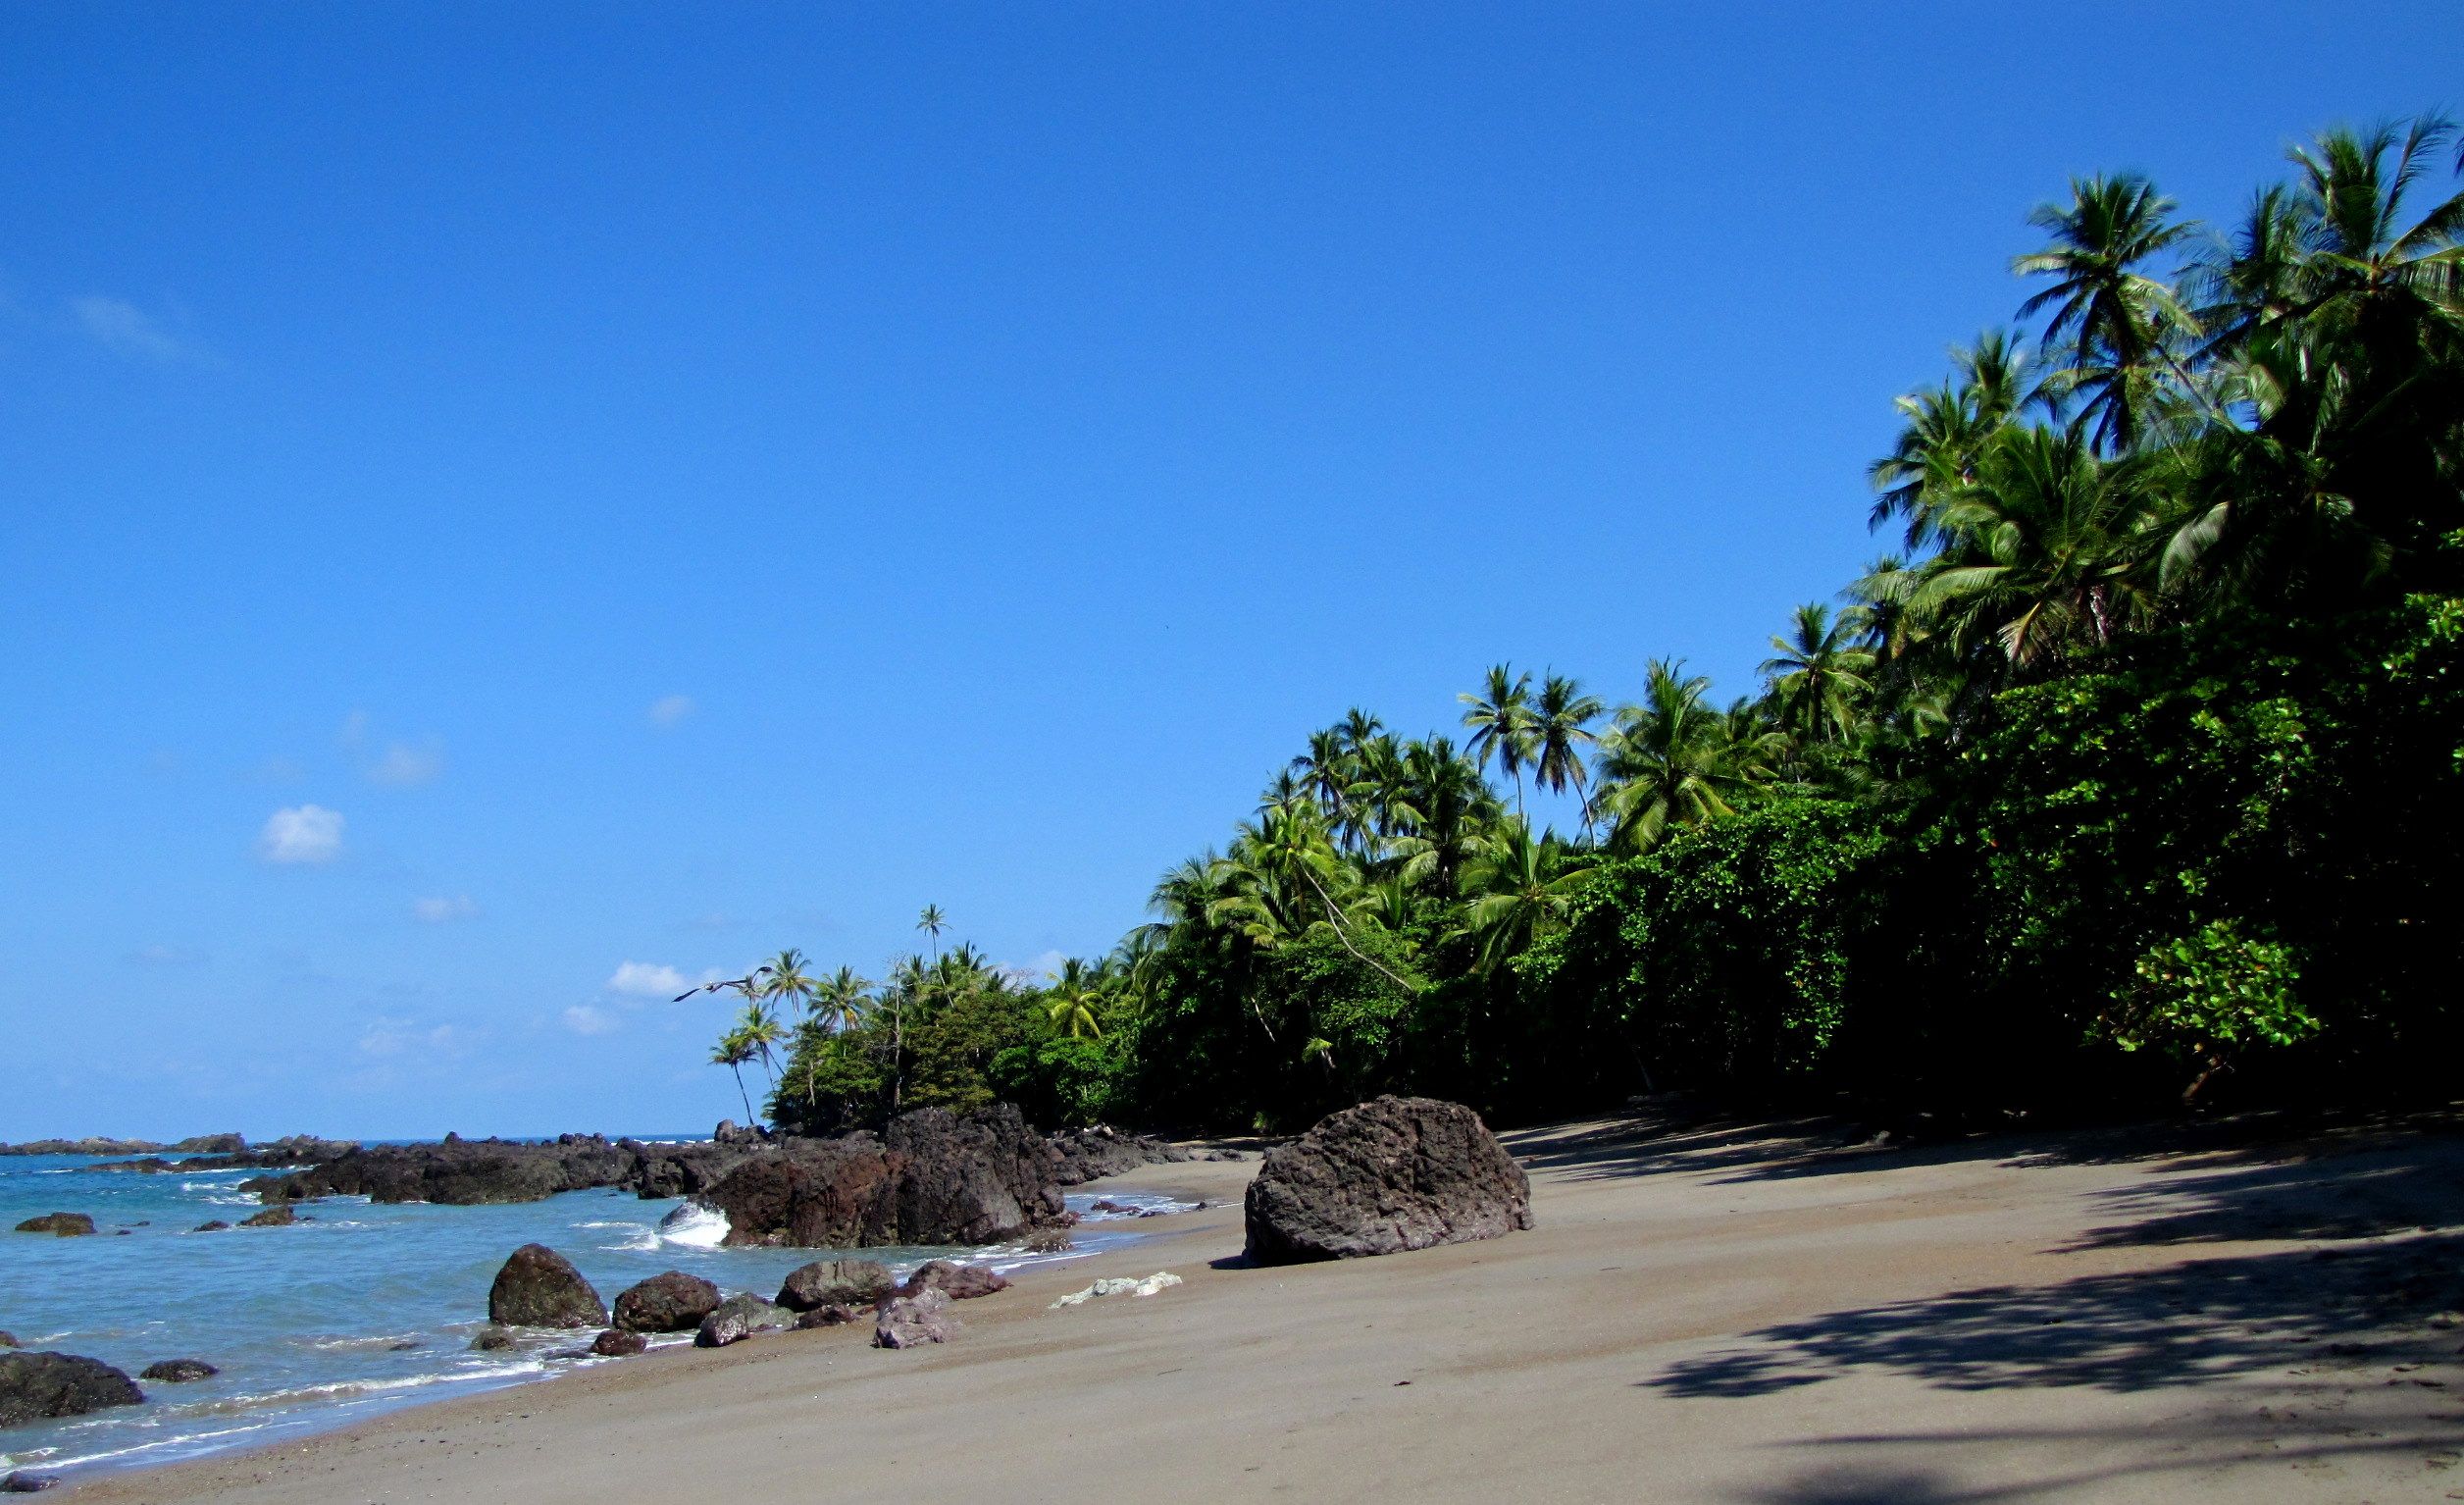
4. Enjoy a beach on Gulf of Dulce. A few of us walked about 45 minutes down the road to a secluded beach on the Gulf of Dulce.
This cost us $0 and was breathtaking! Flocks of bright red macaws come to the beach during the day. We must have seen 20 in one tree alone. Bring lots of water, snacks, sunscreen, and a good book. Spend the whole day. You won’t want to leave 🙂
5. Rent a kayak. Make your way into town and rent a kayak. Its only $4 per hour! Don’t bring more than you need! You will get wet! As always… don’t forget your sunglasses and sun block.
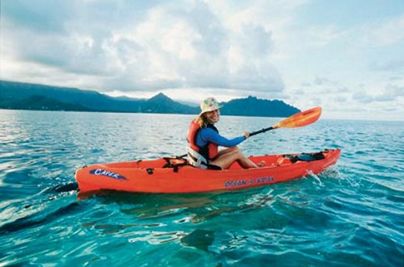
take a few hours and jump in a kayak!
Hostel: $14 USD
Food: $10 USD
Transportation: $10 USD
This is a tough question to answer. There are many different price options you can go while backpacking this area. If you want to really see Corcovado National Park the average daily cost will be significantly higher. The park requires that you hire a guide to take you in and out of the park. This can cost around $85-120 USD per day with meals.
We suggest that you get into the park for a day or two and spend the rest of your time on the outskirts. This area has so much to offer. Whether its near Puerto Jimenez, Drake, Rincon, or La Palma there really is a lot to do. Obviously the world class park is the main attraction.
If you stay in a jungle hostel, cook your own food, and walk to most of your destinations, you can easily backpack for less than $25 per day.
Traveling to Costa Rica or the Osa Peninsula for the first time? Post a question in the comments section below, we’ll respond with advice!


")


Kate and I are about to leave Panama, but before we do, we wanted to compile a list of our Top 5 Panama Destinations for Backpackers to Visit. This guide is based on our personal experience and great tips we’ve picked up from other travelers along the way. Hopefully you enjoy our guide! Panama was picked as the number one place to travel to in 2012 by the New York Times. Although it’s a small country (about the size of the state of South Carolina), it has a great variety of amazing attractions such as:
It’s difficult to think of any other destination in the world that offers such a variety of attractions so close by and so easy to get to for US citizens.
Kate and Brian in Panama!
If you only have a few weeks to travel, fly into Panama City. Panama City is the biggest city in Central America. It’s both a thriving center for business and an entrance to the beautiful countryside of Panama. “PC” has a beautiful skyline reminiscent of many large international cities. There are many areas around the city for dining and dancing. Most backpackers stay in Casco Viejo, the historic district that resembles a combination of New Orleans and Sevilla, Spain. Panama City is most known for its access to the engineering marvel that is the Panama Canal. During your stay in Panama City, we recommend having lunch at the local fish market, where delicious ceviche, among other things, is served by the cup for only $1.25.
This hidden gem is a tropical mountain town that you cannot miss. Santa Fe enjoys one of the most extreme micro-climates in the world, with daily temperatures between 50 and 90 degrees Fahrenheit. One of the traveling secrets of Panama, this small town is known for its mountain vistas, waterfalls, beautiful rivers, and cloud forests. Walking in Santa Fe you will be stunned by the streets lined with orchids and fruits trees.
This surfers’ paradise of clapboard houses was built by the United Fruit Company in the early 20th century. Bocas is a relaxed community of Panamanians and expats. The friendly atmosphere is very welcoming to backpackers and tourists. Travelers to this island town have a reputation for canceling future plans. Make sure to spend multiple days on the island of Bastamientos, a picturesque beach where you can enjoy waves and great snorkeling.
The gorgeous mountain town of Boquete is another hidden gem of Panama. This charming village is 75 to 80 degrees with a welcome breeze year round. The weather is so nice, natives have dubbed the town “The Land of Eternal Spring”. Boquete is known for its coffee and flowers — you can visit many different coffee plantation tours in the nearby hills. Tip: Take a short trek to the “Lost Waterfalls” to see three gorgeous waterfalls. For adventurous travelers, try the 26km round-trip hike to Panama’s tallest peak, Volcan Barú. Check our full post on Backpacking Boquete, Panama here.
Santa Catalina is a fishing village that existed in quiet seclusion until discovered by adventurous surfers in the 1970’s. Today, Santa Catalina offers a smattering of surf camps, low cost hostels and hotels, and great vibes. Santa Catalina is still secluded, as the closest town with an ATM, grocery store, and other basic services is Soná, which lies about an hour away. This tropical paradise offers some of the best surf in Panama. If you want to relax and view the beautiful underwater wildlife in the Pacific, head to Isla Coiba, a Panamanian National Park located just off of Santa Catalina.
After Kate and I visited all of these places, Santa Fe was our favorite for of how low key it is. Santa Fe seems to be what Boquete was 20 years ago — there is not much development here due to the protection of the cloud forest. Santa Fe is a great place to kick back, hike, visit multiple beautiful waterfalls, and more. I look forward to expanding more about this town in a future post.
We hope you enjoyed our Top 5 Panama Destinations for Backpackers to Visit list! Which of these destinations have you traveled to? Are you planning a backpacking trip to Panama? Leave a question or comment below and we’ll be happy to help 🙂